← Back to Contents
7 Automotive Electrical Appliances / 7.5 Electric Horn Device | PDF pages 1493-1504
7.5 Electric Horn Device
7.5 Electric Horn Device
7.5.1 Specifications
7.5.1.1 Fastener Specifications
Range Of Torque
Fastener Specifications
Specifications
Foot Pounds of Torque (ft lbs)
The fixing bolt connecting the electric
(6.5 +/- .75 ) ft lbs
M6
horn assembly and the sealing
crossbeam
The fixing nut connecting the electric
(6.5 +/- .75 ) ft lbs
M6
horn assembly and the sealing
crossbeam
The fixing bolt connecting the air horn
(6.5 +/- .75 ) ft lbs
M6
and the air horn bracket
The fixing bolt connecting the horn
(103 +/- 7.5) ft lbs
M14
bracket and the frame assembly
The fixing bolt connecting the horn
(103 +/- 7.5) ft lbs
M14
bracket and the frame assembly
7.5.2 Decomposition Diagram
7.5.2.1 Decomposition Diagram
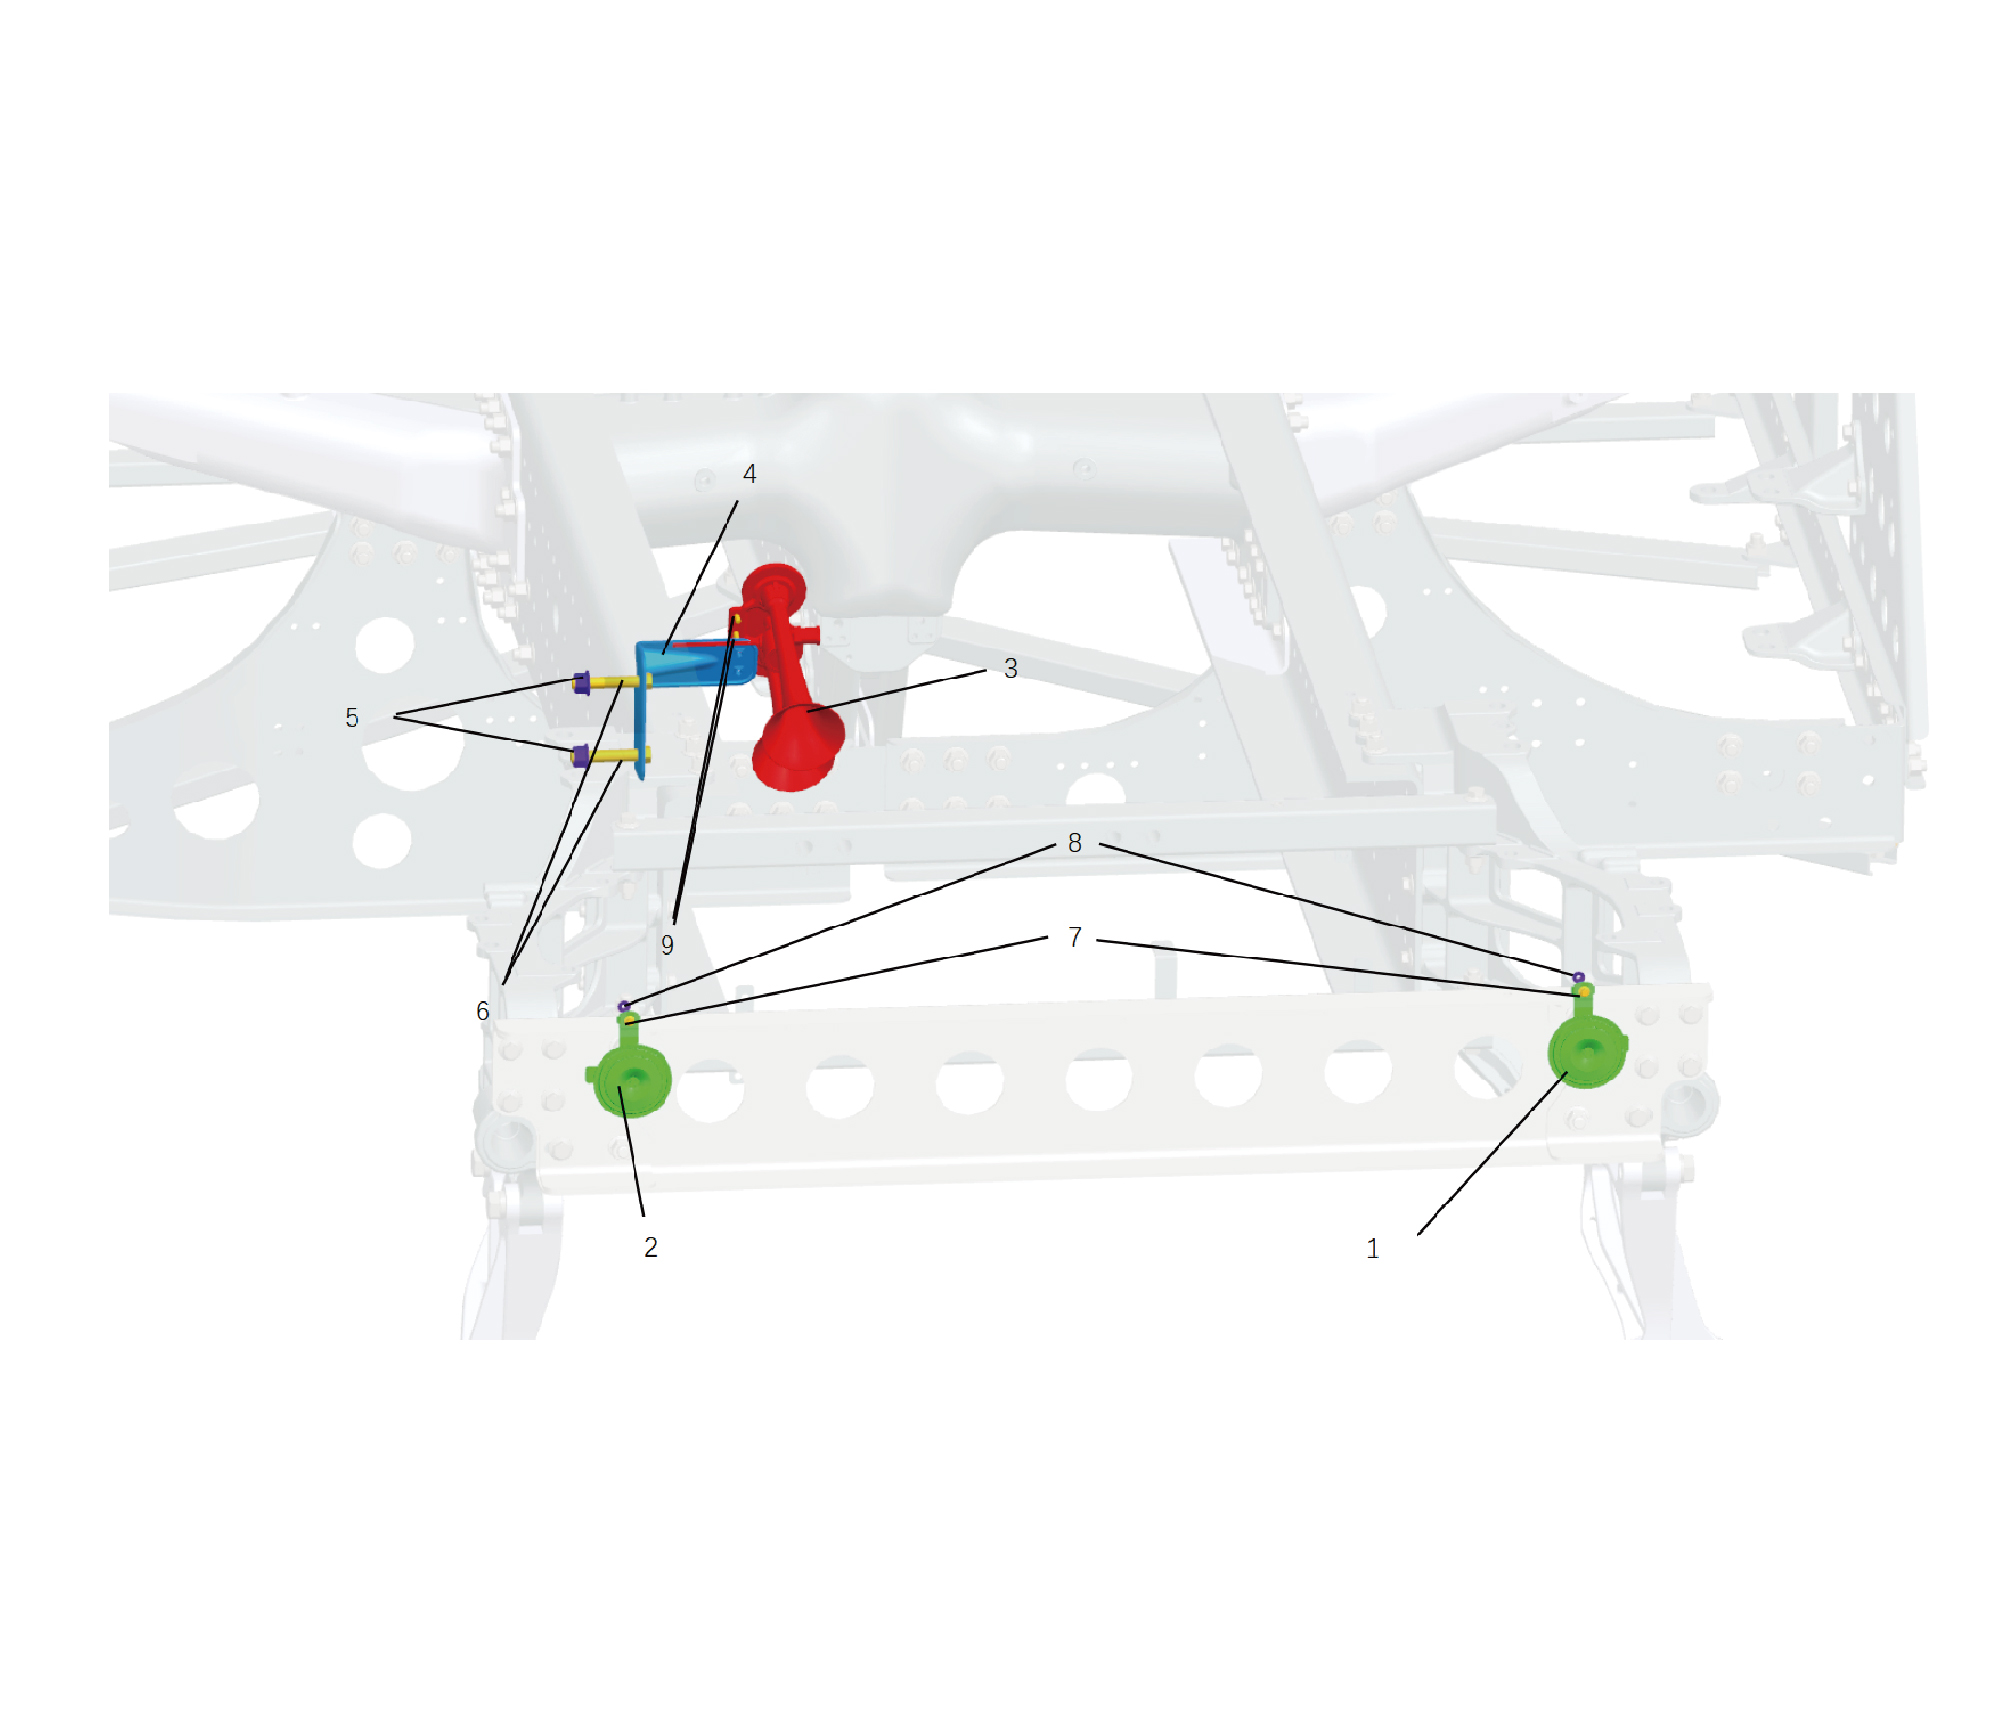
1.
Bass Electric Horn
6.
Hexagon Flange Lock Nut_All Metal
7.
2.
Tweeter Electric Horn
Hexagon Flange Bolt
3.
Trumpet Type Horn
8.
Hexagon Flange Nut
4.
9.
Trumpet Type Horn Bracket
Hexagon Flange Bolt
5.
Hexagon Flange Bolt
7.5.3 Inspect
7.5.3.1 Inspection of Horn
1. Park the vehicle, press the horn button on the steering
wheel to check the electric horn is working properly.
2. Press the electric/air horn change-over switch, press the
horn switch repeatedly, and check whether the air horn is
working properly.
7.5.4 Dismantling and Installation
7.5.4.1 Replacement of Electric Horn Assembly - low Pitch
Assembly - low Pitch
Removal Procedures
1
Open the door.
2
Open the front flip cover plate.
3
Disconnect the battery negative cable.
caution
power down the high-voltage system before
disconnecting the negative pole of the storage
battery.
4
Remove the engine compartment trim panel body.
5
Remove the through-type lamp.
6
Remove the front MMW radar shield.
7
Remove the forward MMW radar.
8
Remove the front MMW radar adapter bracket.
9
Remove the left cover plate of the corner radar.
10
Remove the right cover plate of the corner radar.
11
Remove the front bumper assembly.
12
Disconnect 1 harness connector of the electric horn
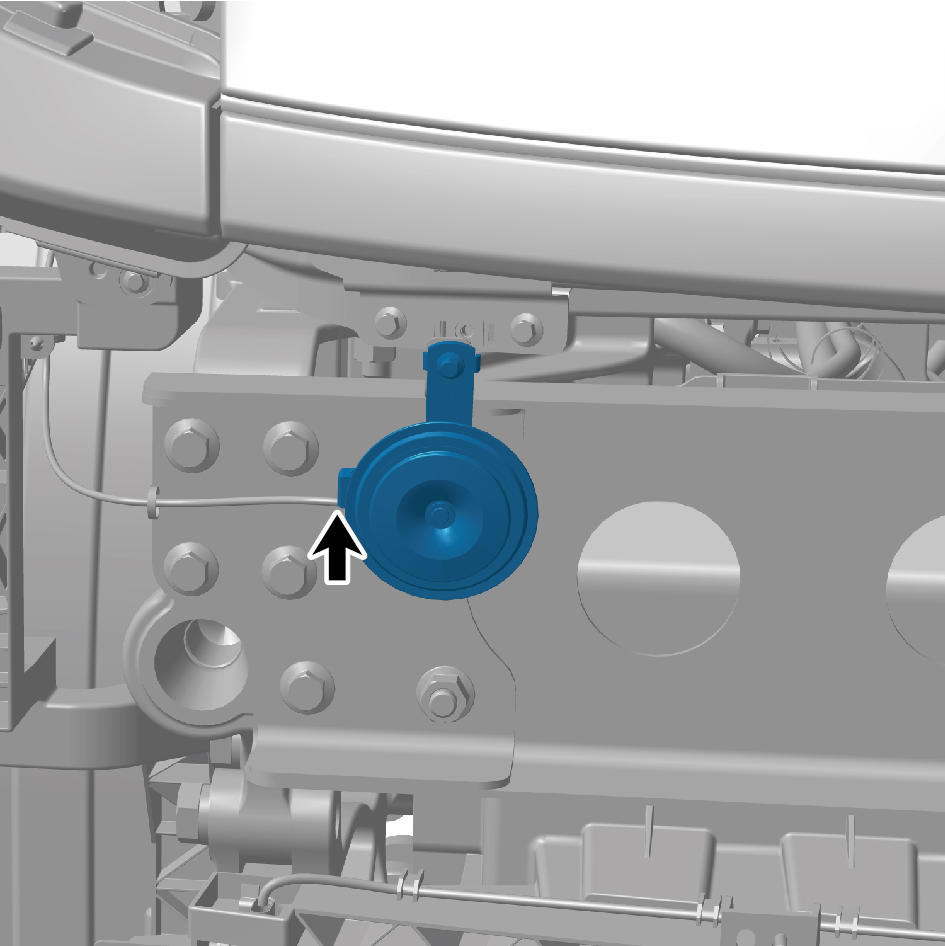
assembly - low pitch.
13
Remove 1 fixing nut of the electric horn assembly - low
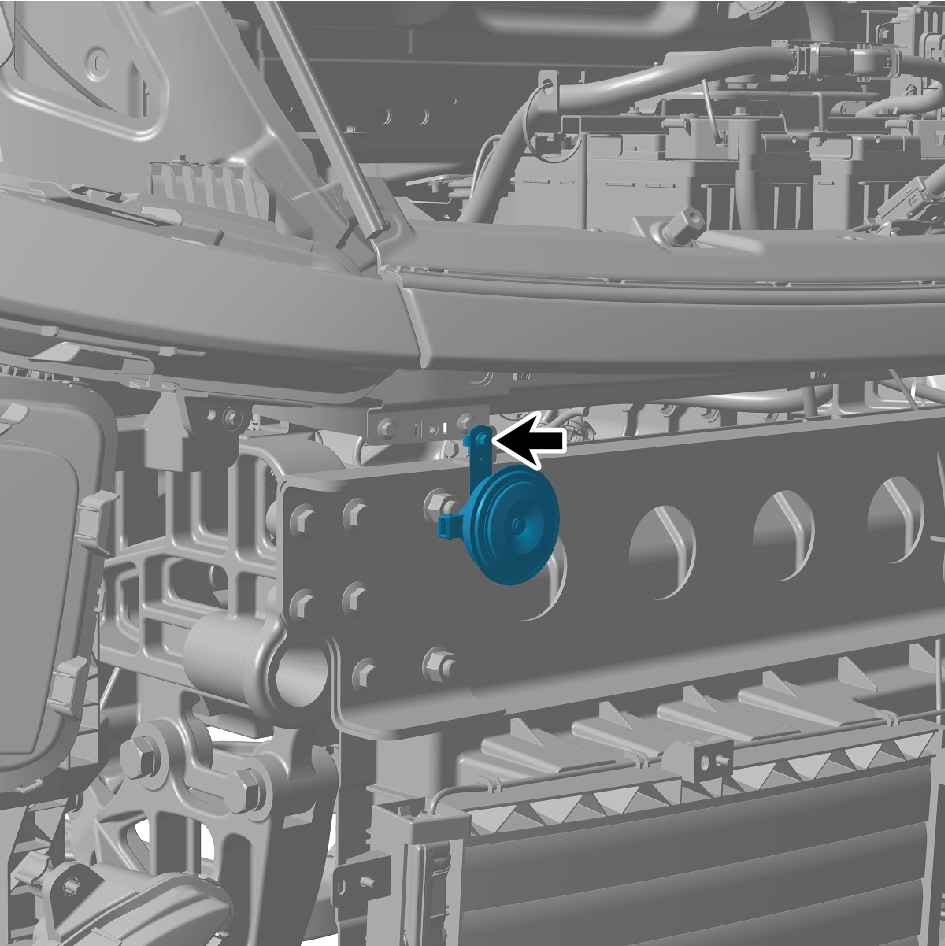
pitch.
14
Remove the electric horn assembly - low pitch.
Installation Procedures
1
Move the electric horn assembly - low pitch to the
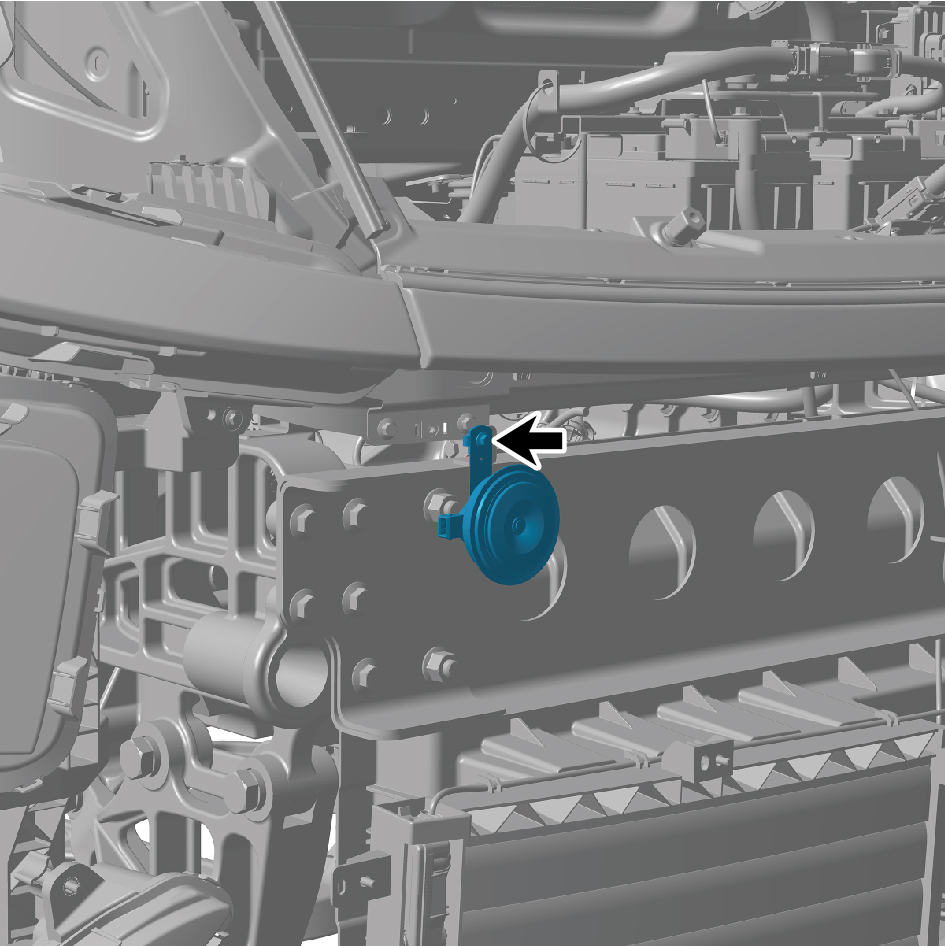
mounting position.
2
Install and tighten 1 fixing nut of the electric horn
assembly - low pitch.
Torque: (6.5 +/- .75) ft lbs
3
Connect 1 harness connector of the electric horn
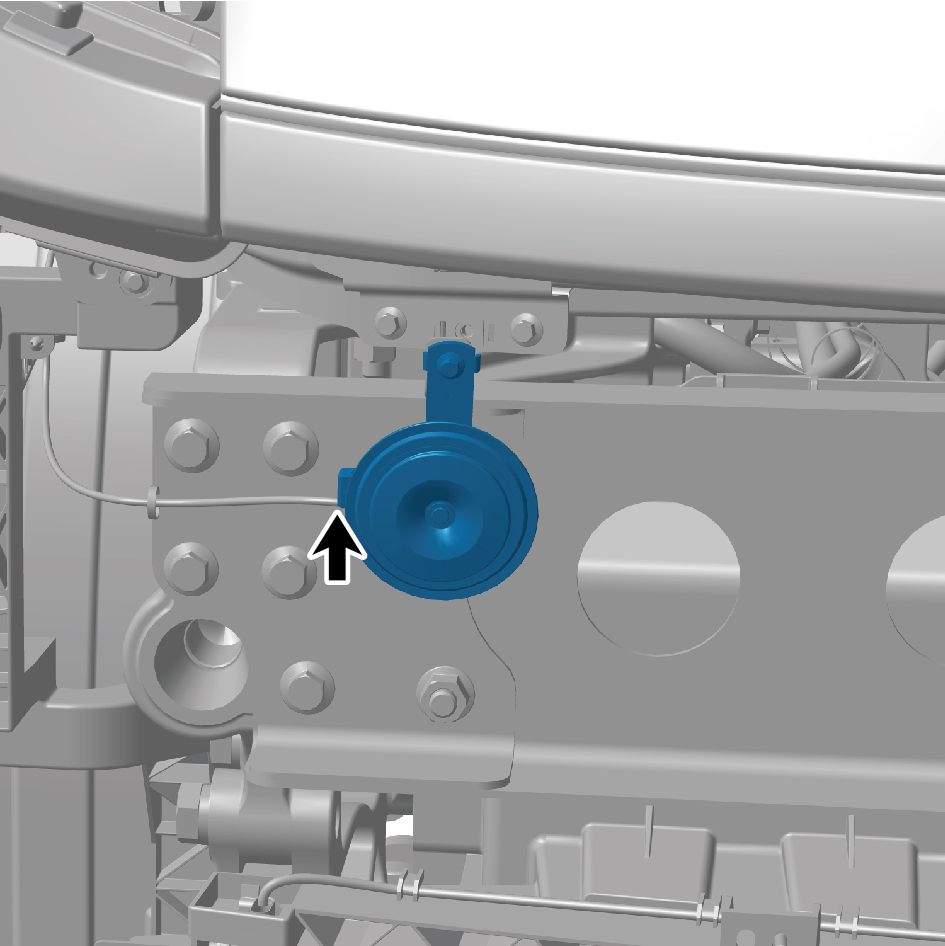
assembly - low pitch.
caution
The harness is firmly connected following the
principal of "insert until a click is heard for
confirmation".
4
Install the front bumper assembly.
5
Install the right cover plate of the corner radar.
6
Install the left cover plate of the corner radar.
7
Install the front MMW radar adapter bracket.
8
Install the forward MMW radar.
9
Install the front MMW radar shield.
10
Install the through-type lamp.
11
Install the engine compartment trim panel body.
12
Connect the battery negative cable.
13
Close the front flip cover plate.
14
Close the door.
7.5.4.2 Replacement of Electric Horn Assembly - High Pitch
Assembly - High Pitch
Removal Procedures
1
Open the door.
2
Open the front flip cover plate.
3
Disconnect the battery negative cable.
caution
power down the high-voltage system before
disconnecting the negative pole of the storage
battery.
4
Remove the engine compartment trim panel body.
5
Remove the through-type lamp.
6
Remove the front MMW radar shield.
7
Remove the forward MMW radar.
8
Remove the front MMW radar adapter bracket.
9
Remove the left cover plate of the corner radar.
10
Remove the right cover plate of the corner radar.
11
Remove the front bumper assembly.
12
Disconnect 1 harness connector of the electric horn
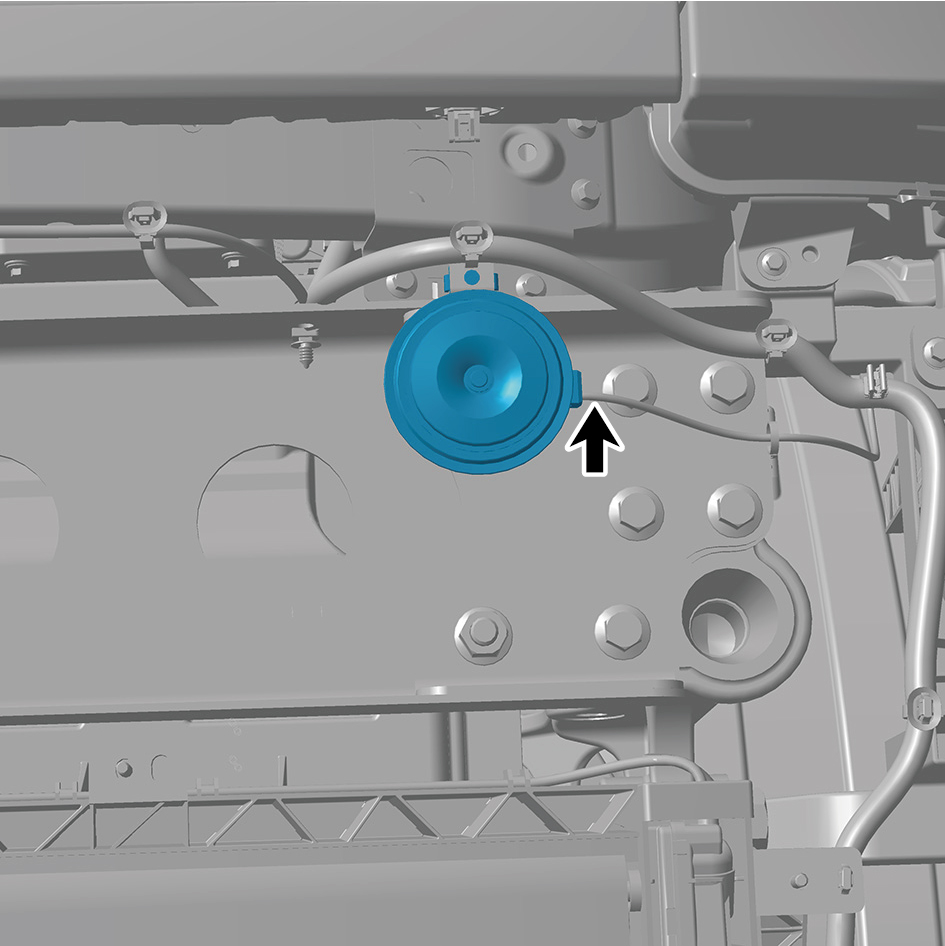
assembly - high pitch.
13
Remove 1 fixing nut of the electric horn assembly - high
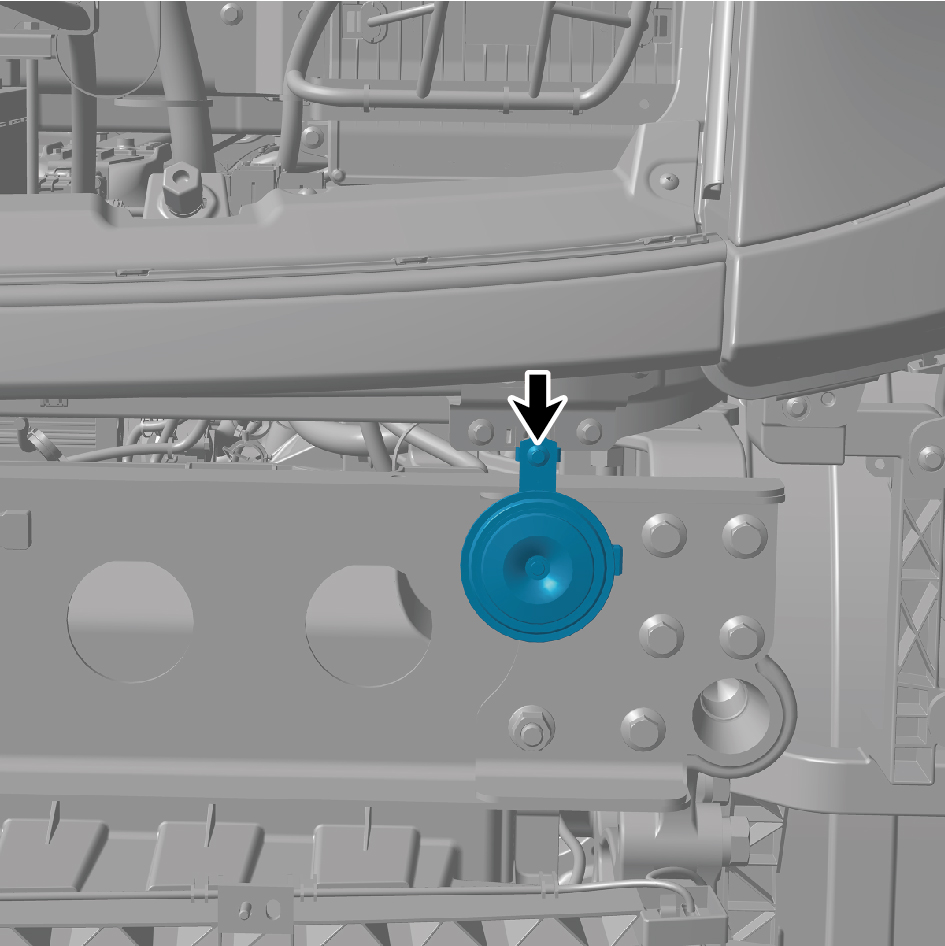
pitch.
14
Remove the electric horn assembly - high pitch.
Installation Procedures
1
Move the electric horn assembly - high pitch to the
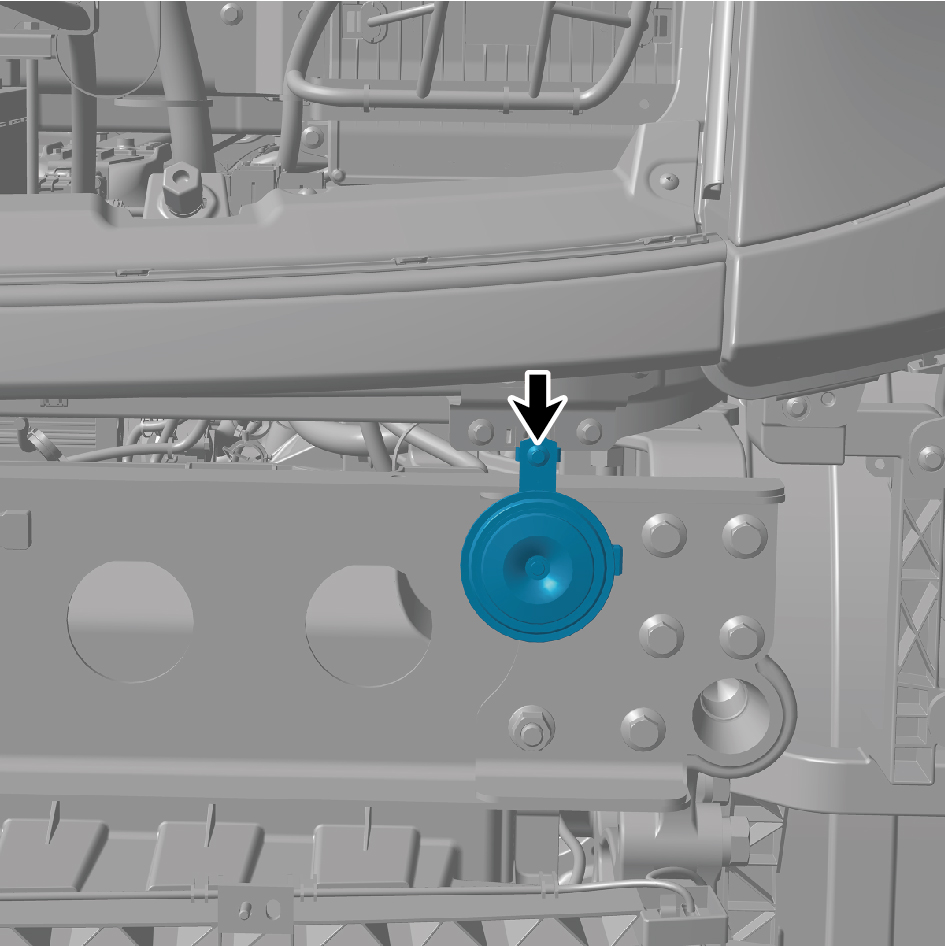
mounting position.
2
Install 1 fixing nut of the electric horn assembly - high
pitch.
Torque: (6.5 ft-lb +/- .75 ft-lb) ft-lb
3
Connect 1 harness connector of the electric horn
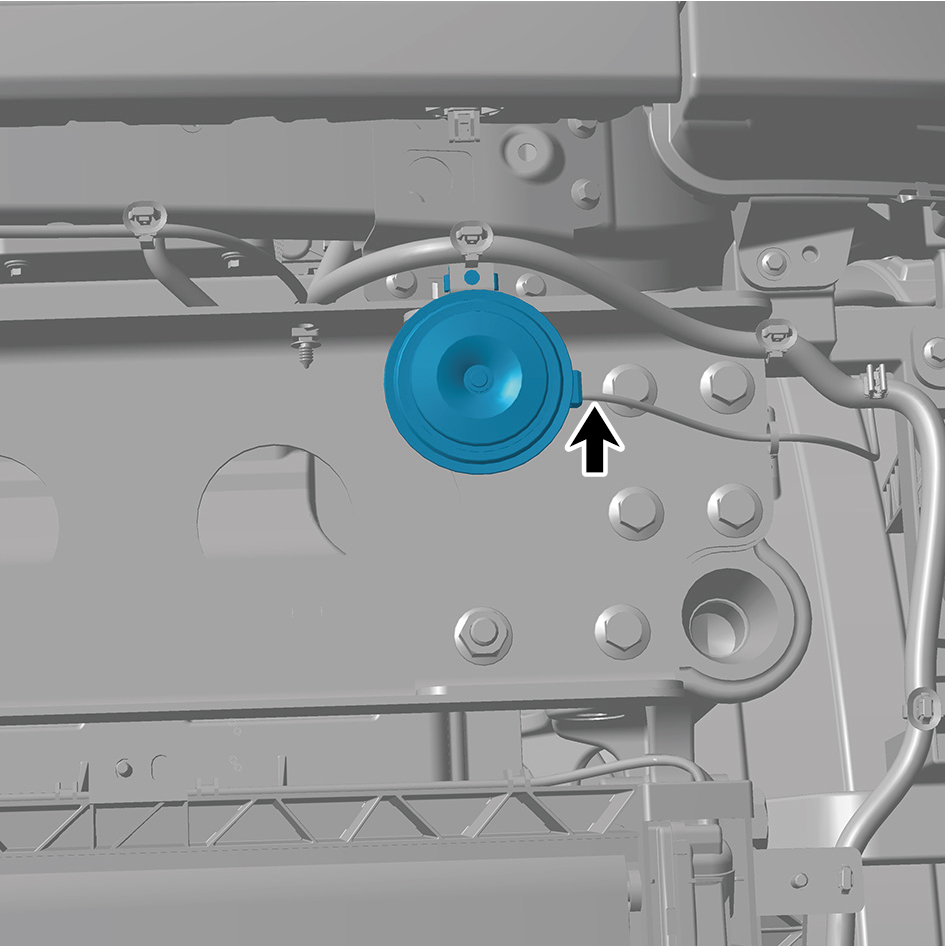
assembly - high pitch.
caution
The harness is firmly connected following the
principal of "insert until a click is heard for
confirmation".
4
Install the front bumper assembly.
5
Install the right cover plate of the corner radar.
6
Install the left cover plate of the corner radar.
7
Install the front MMW radar adapter bracket.
8
Install the forward MMW radar.
9
Install the front MMW radar shield.
10
Install the through-type lamp.
11
Install the engine compartment trim panel body.
12
Connect the battery negative cable.
13
Close the front flip cover plate.
14
Close the door.
7.5.4.3 Replacement of Air Horn
Removal Procedures
1
Open the door.
2
Open the front flip cover plate.
3
Disconnect the battery negative cable.
4
Perform power-off of high voltage system.
5
Jack the front end of the vehicle.
6
Drain the transmission hydraulic oil.
7
Remove the left front wheel housing rear body.
8
Remove the left side wall lower trim panel assembly.
9
Remove the side wall upper mounting bracket assembly
2.
10
Remove the left side wall mounting bracket 1.
11
Remove the left side wall mounting bracket 2.
12
Remove the left side wall lower trim panel mounting frame
assembly.
13
Remove the electric oil pump.
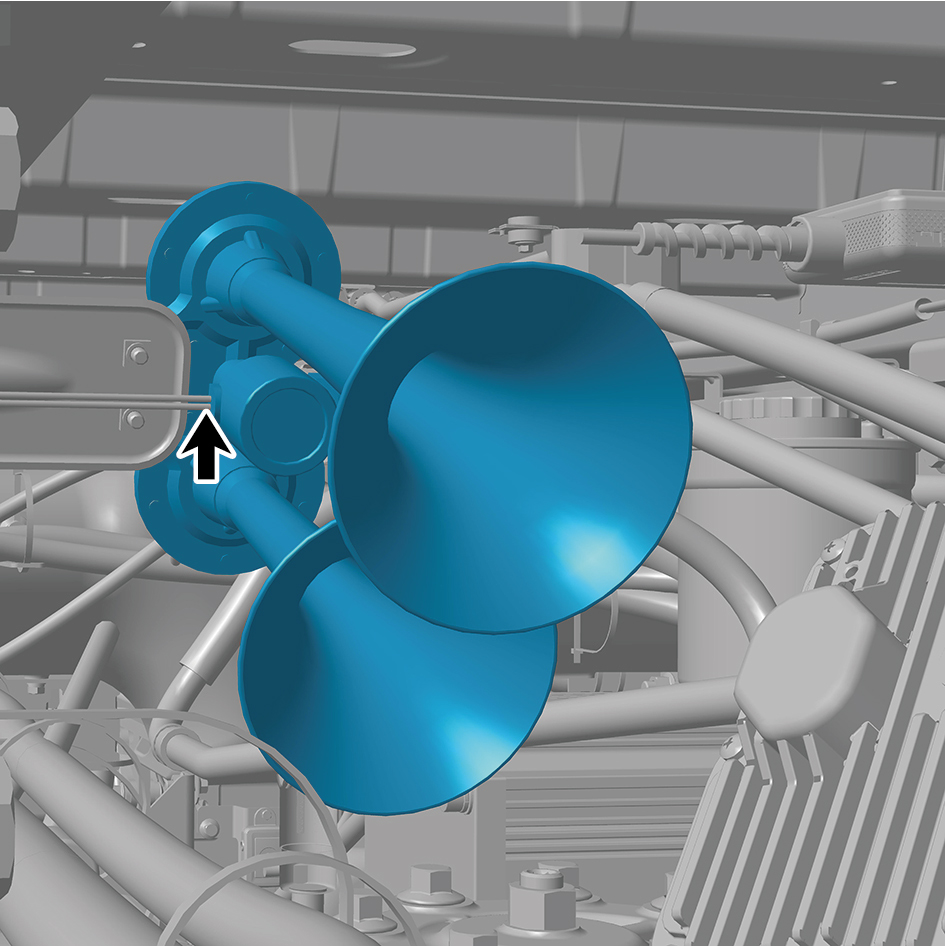
14
Disconnect 1 harness connector of the air horn.
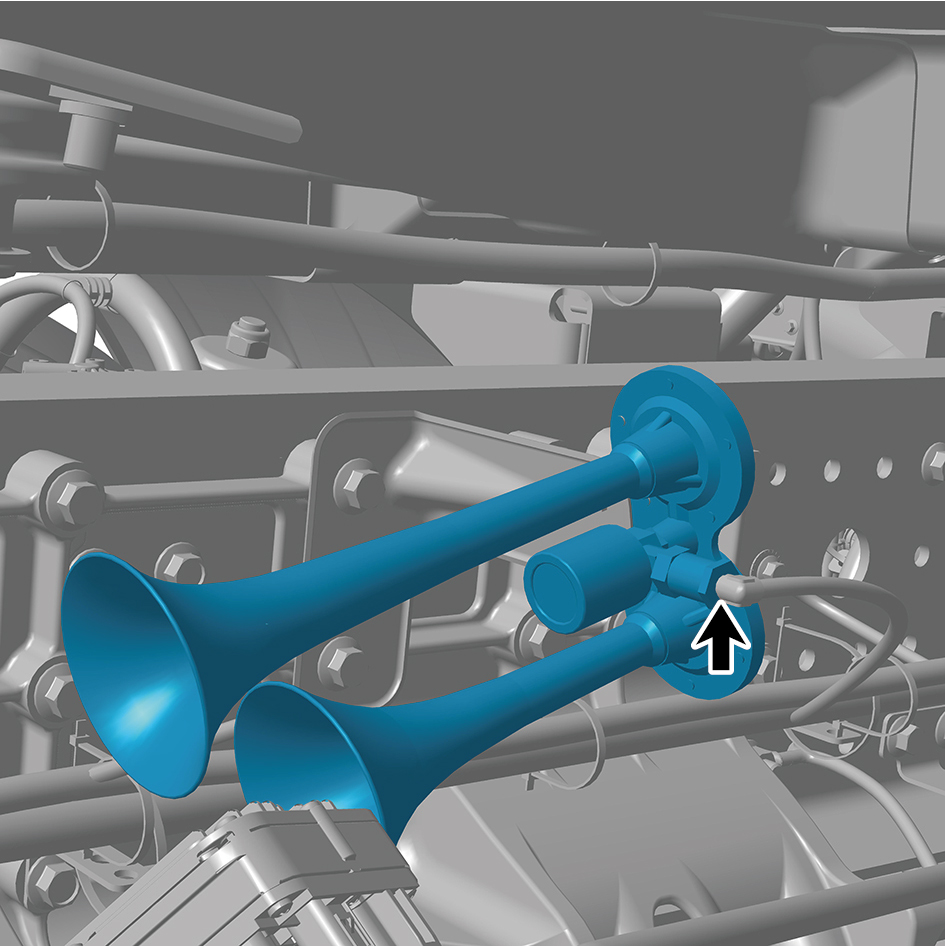
15
Disconnect 1 air pipe of the air horn.
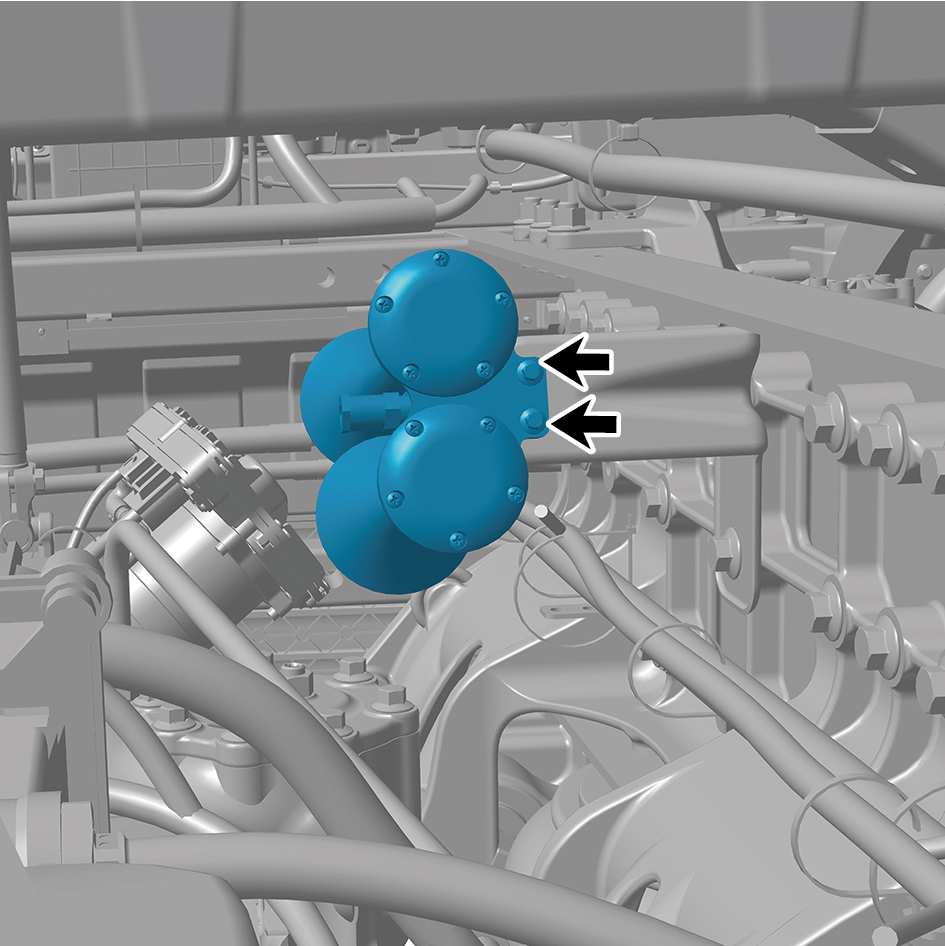
16
Remove 2 fixing bolts of the air horn.
17
Remove the air horn.
Installation Procedures
1
Move the air horn to the mounting position.
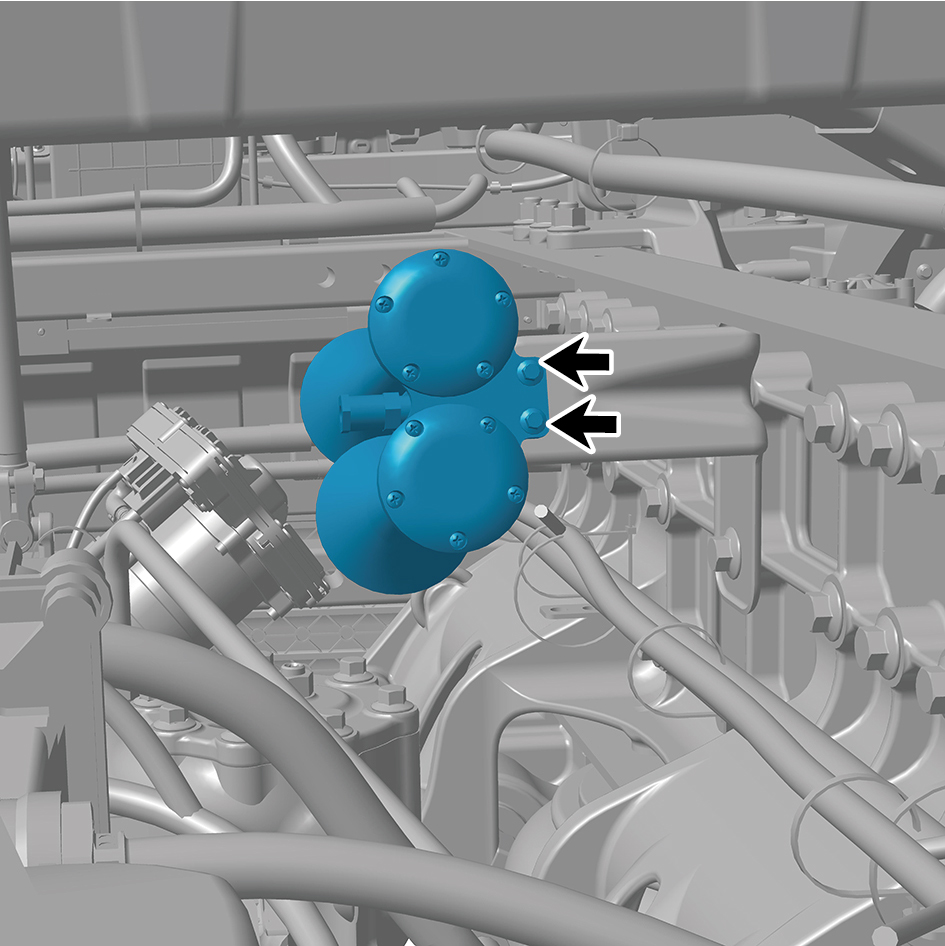
2
Install 2 fixing bolts of the air horn.
Torque: (6.5 +/- .75) ft lbs
3
Connect 1 air pipe of the air horn.
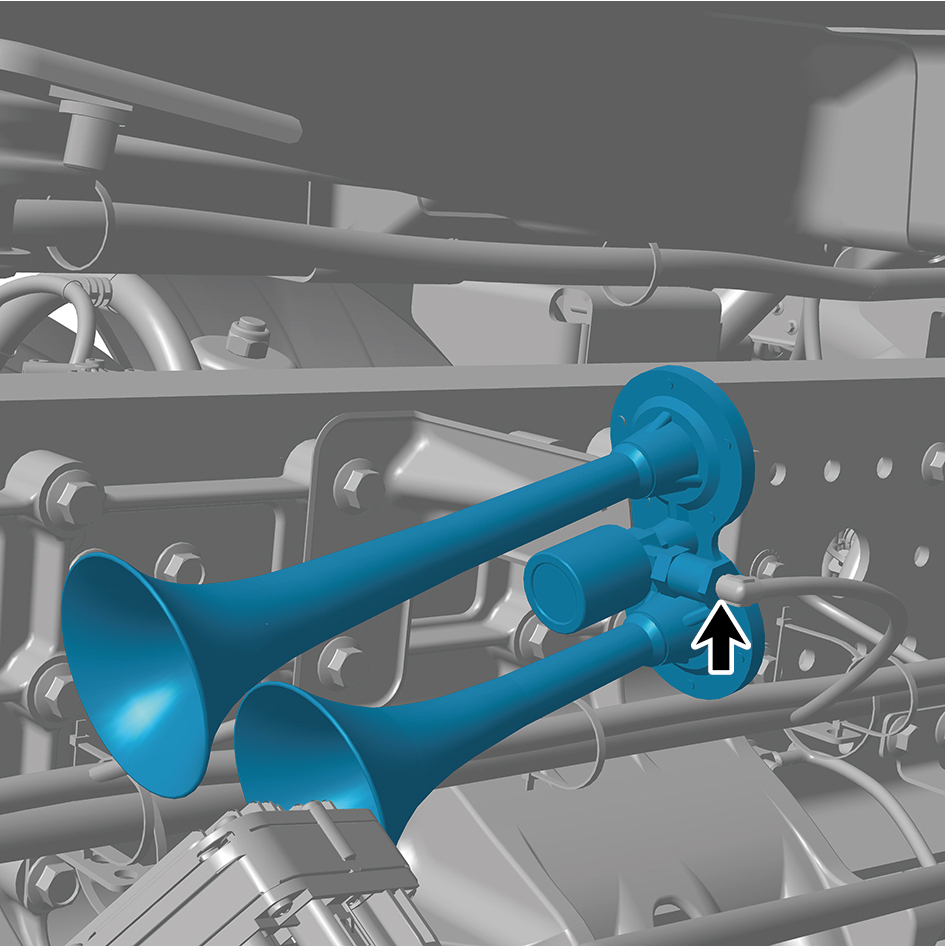
4
Connect 1 harness connector of the air horn.
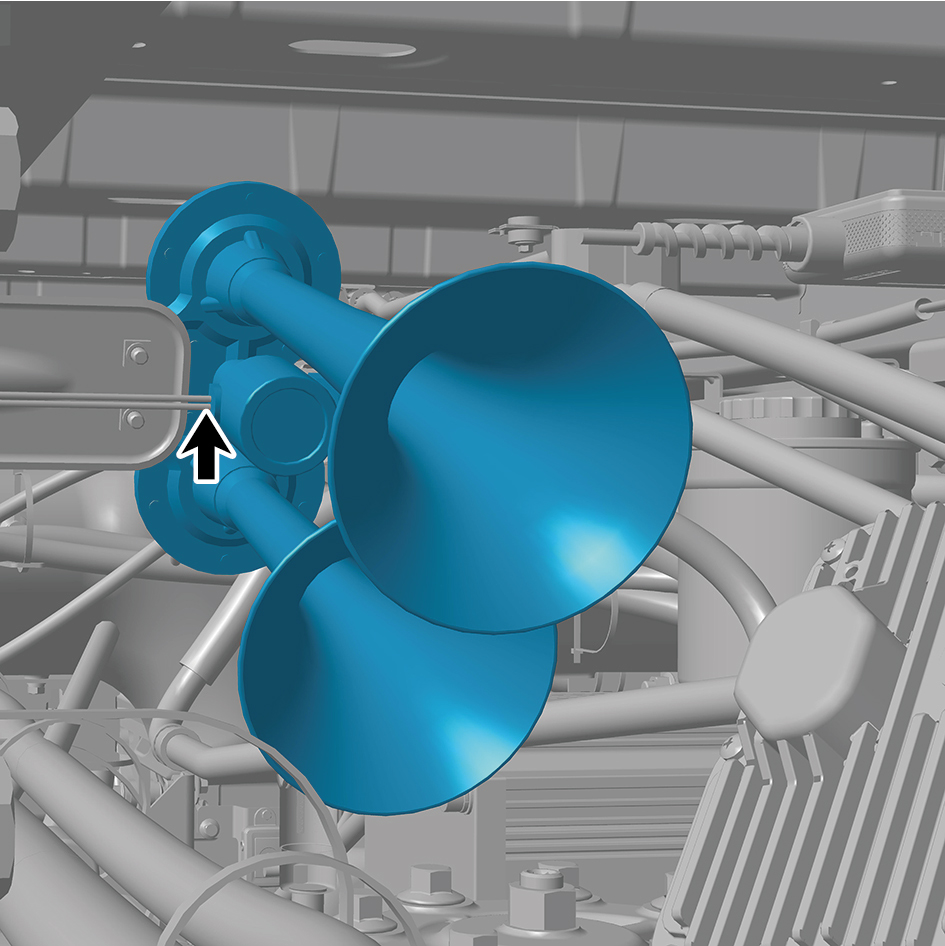
caution
The harness is firmly connected following the
principal of "insert until a click is heard for
confirmation".
5
Install the electric oil pump.
6
Install the left side wall lower trim panel mounting frame
assembly.
7
Install the left side wall mounting bracket 2.
8
Install the left side wall mounting bracket 1.
9
Install the side wall upper mounting bracket assembly 2.
10
Install the left side wall lower trim panel assembly.
11
Install the left front wheel housing rear body.
12
Add the transmission hydraulic oil.
13
Lower the front end of the vehicle.
14
Perform power-on of the high voltage system.
15
Connect the battery negative cable.
16
Close the front flip cover plate.
17
Close the door.