← Back to Contents
6 Vehicle Body / 6.29 Door Trim Panel Device | PDF pages 877-881
6.29 Door Trim Panel Device
6.29 Door Trim Panel Device
6.29.1 Specifications
6.29.1.1 Fastener Specifications
Range Of Torque
Fastener Specifications
Specifications
Foot Pounds of Torque (ft lbs)
The fixing bolt connecting the door
handle assembly and sliding door
(6.5 +/- .75) ft lbs
M6
assembly inside the car door
The fixing bolts connecting the door trim
(6.5 +/- .75) ft lbs
M6
assembly and the sliding door assembly
6.29.2 Decomposition Diagram
6.29.2.1 Decomposition Diagram
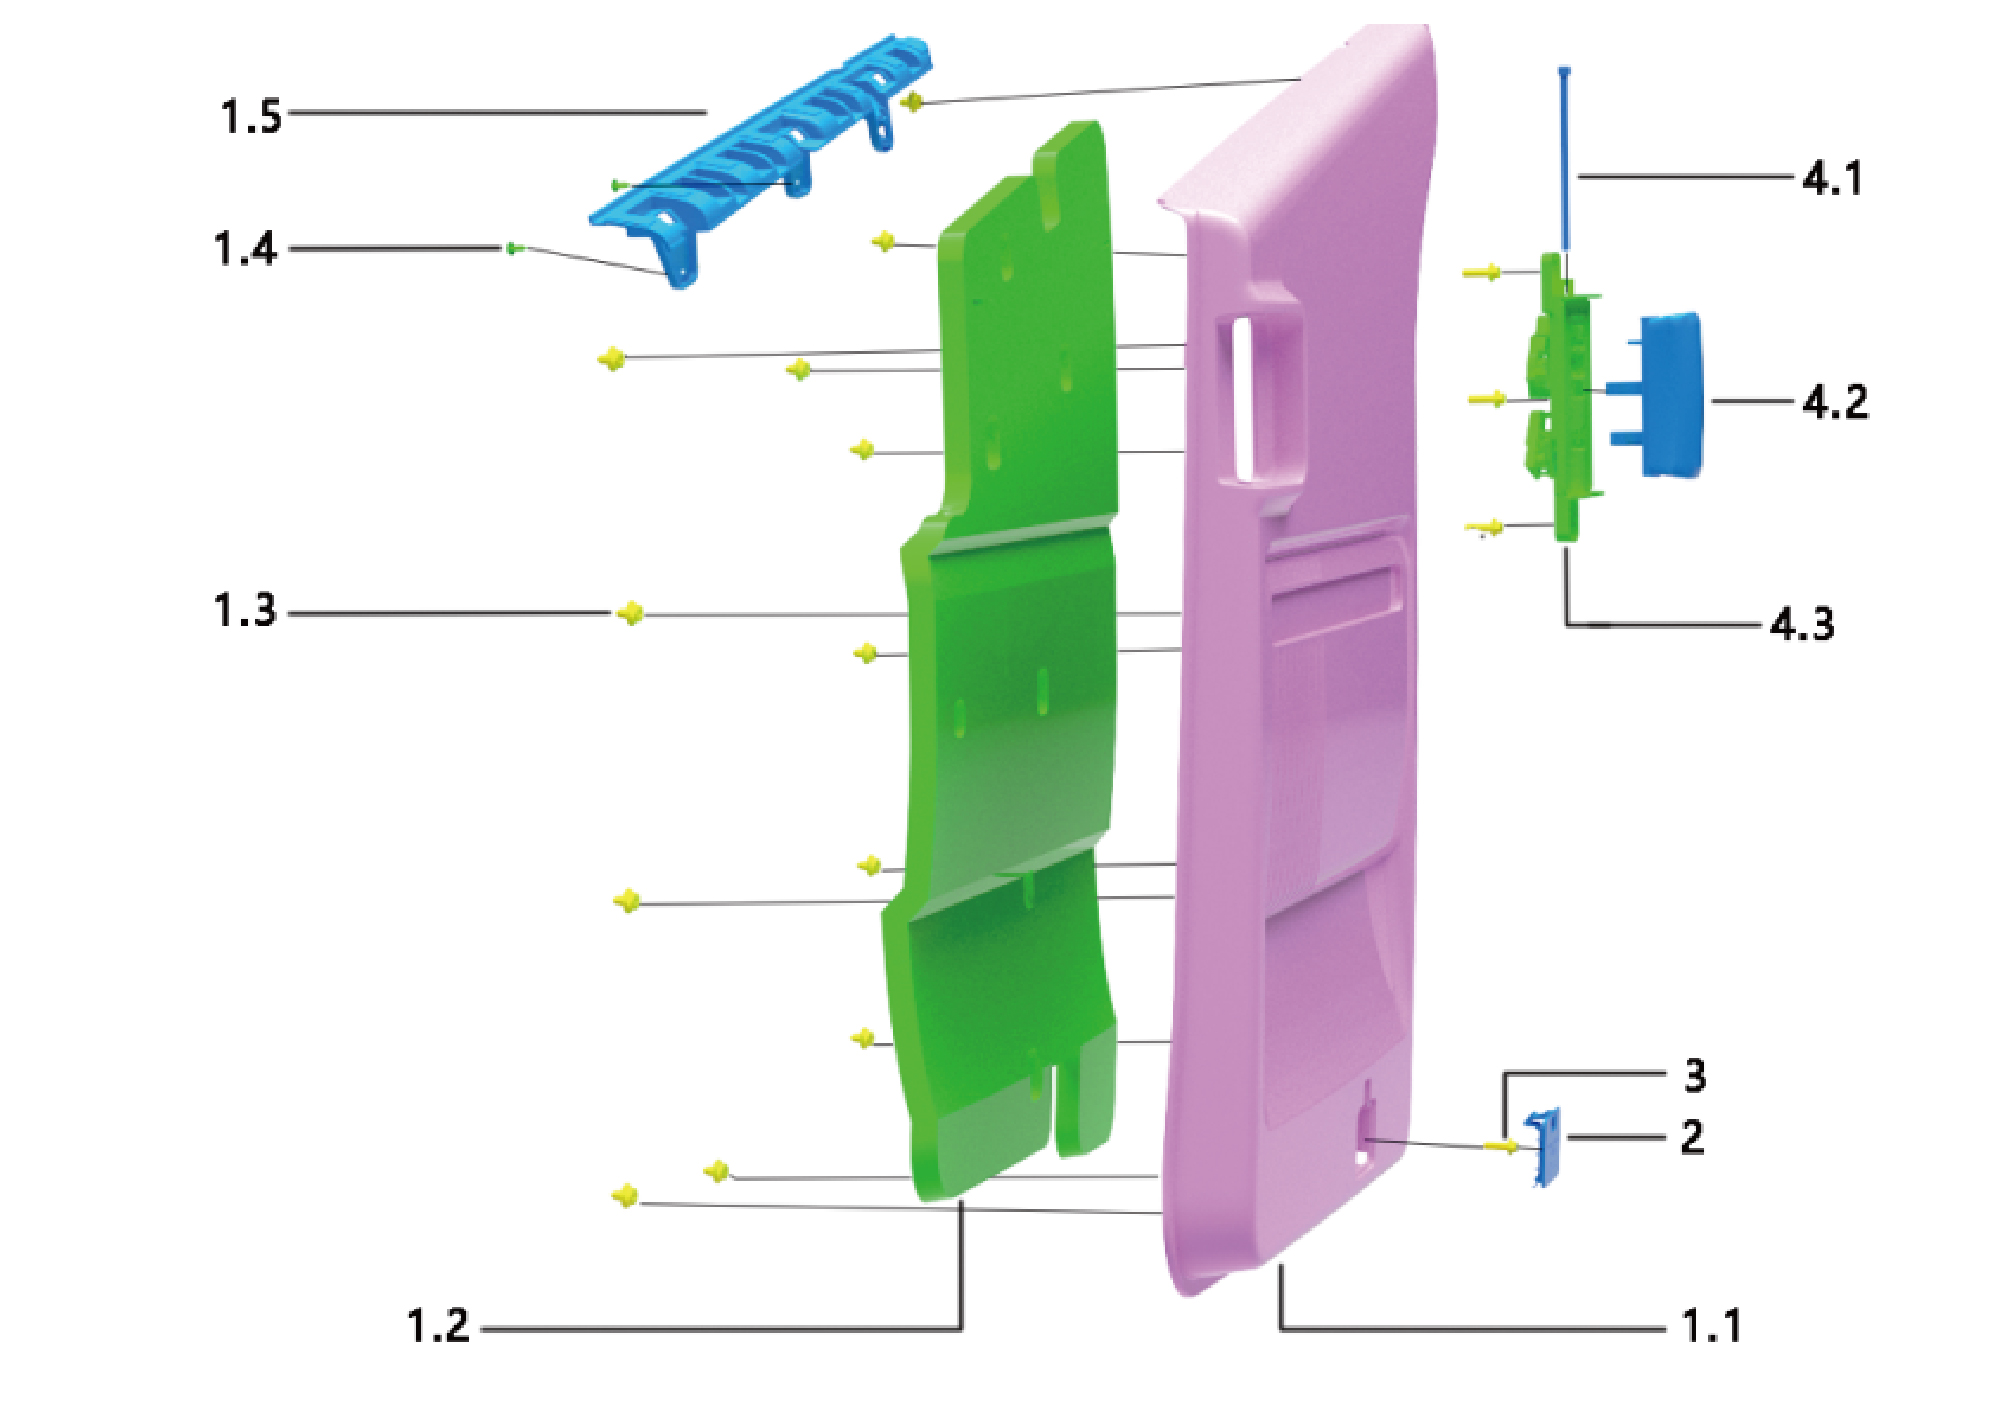
1.1.
2.
Main Body of the Door Panel
Plug Cover
1.2.
3.
Hexagon Flange Bolt
Sound-Absorbing Cotton
1.3.
Plastic Buckle
4.1.
Peg
1.4.
4.2.
Inner Handle
Self-Tapping Screw
1.5.
4.3.
Inner Handle Base
Water Cut Bracket
6.29.3 Dismantling and Installation
6.29.3.1 Replacement of Door Inside Handle Assembly
Assembly
Removal Procedures
1
Open the door.
2
Remove the cable cover plate.
3
Remove the door protective plate assembly.
4
Remove 3 fixing bolts of the door inside handle assembly.
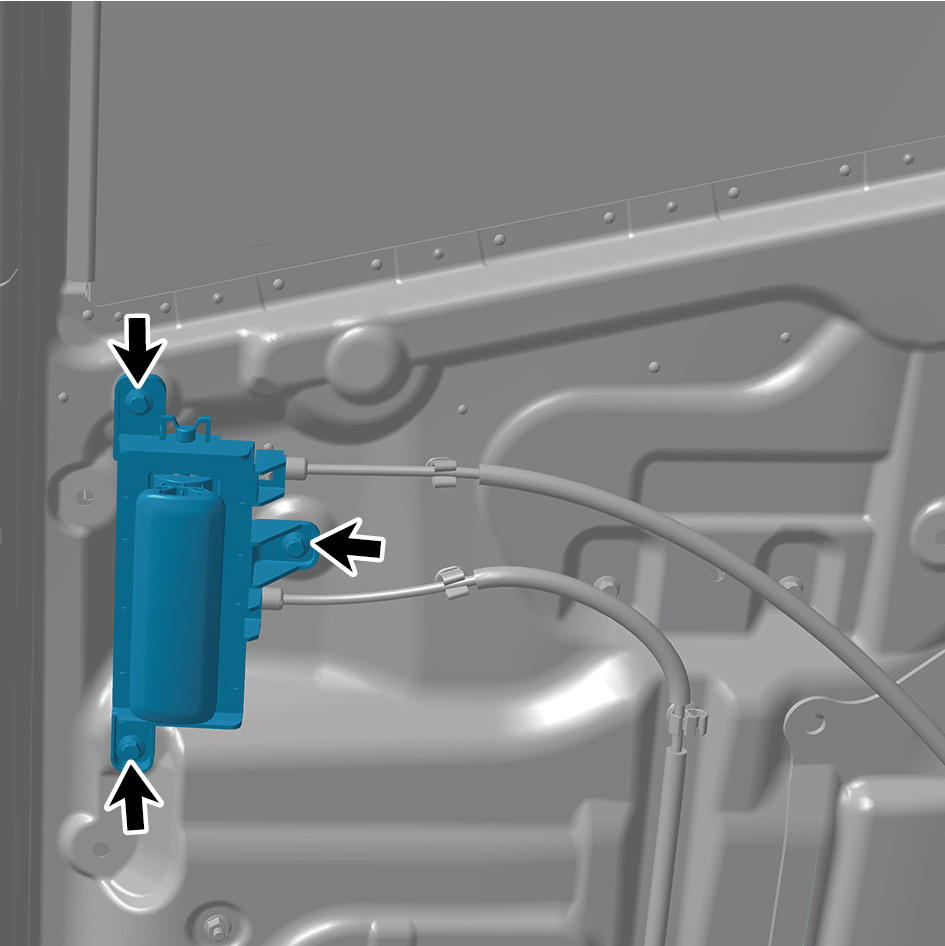
5
Disengage 2 cables of the door inside handle assembly.
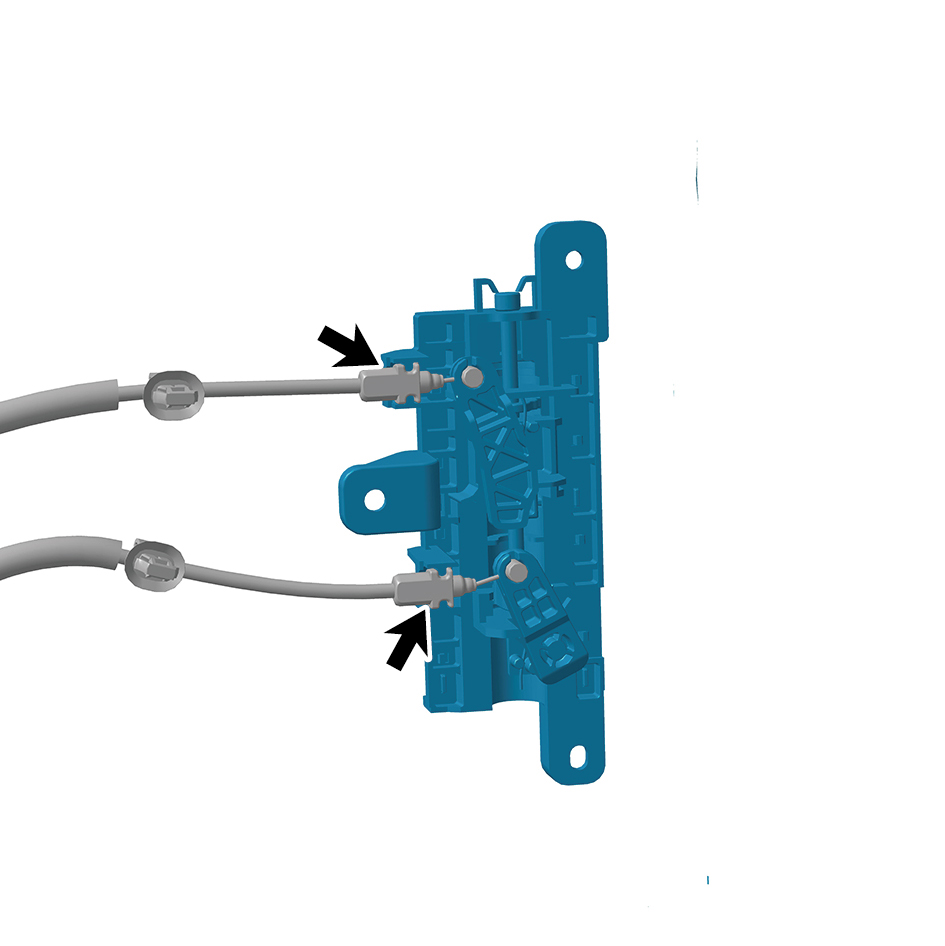
6
Remove the door inside handle assembly.
Installation Procedures
1
Move the door inside handle assembly to the mounting
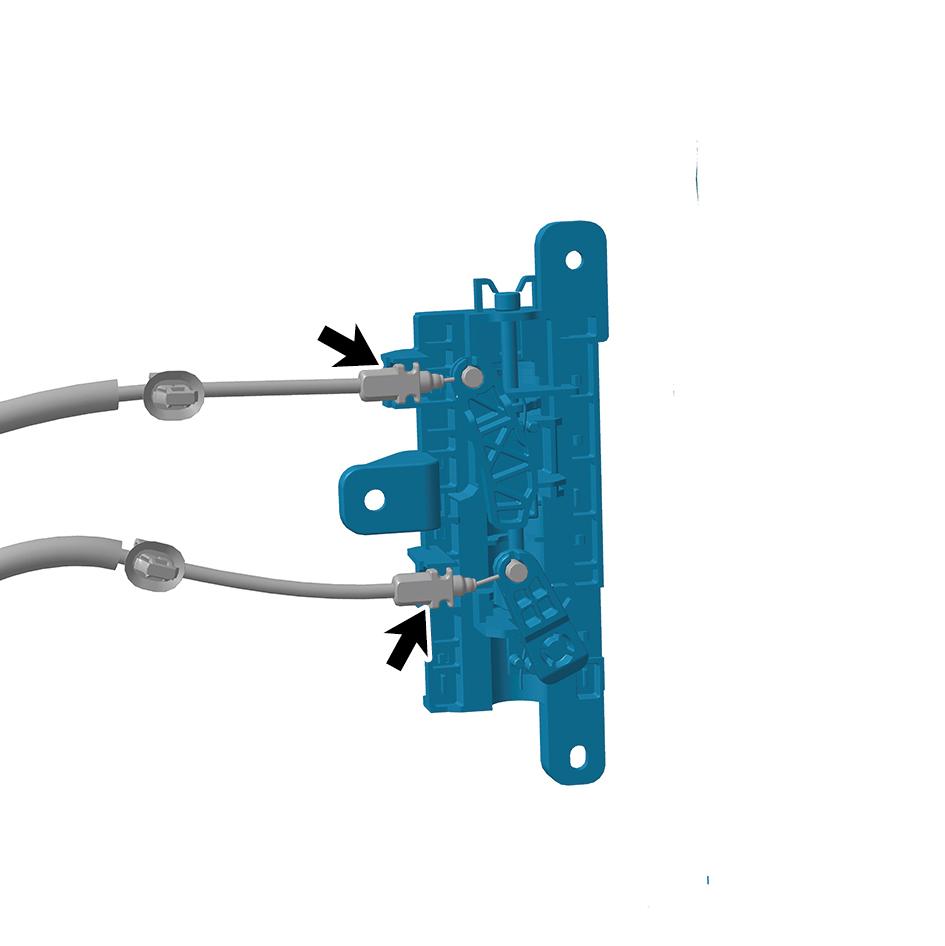
position.
2
Connect 2 cables of the door inside handle assembly.
3
Install 3 fixing bolts of the door inside handle assembly.
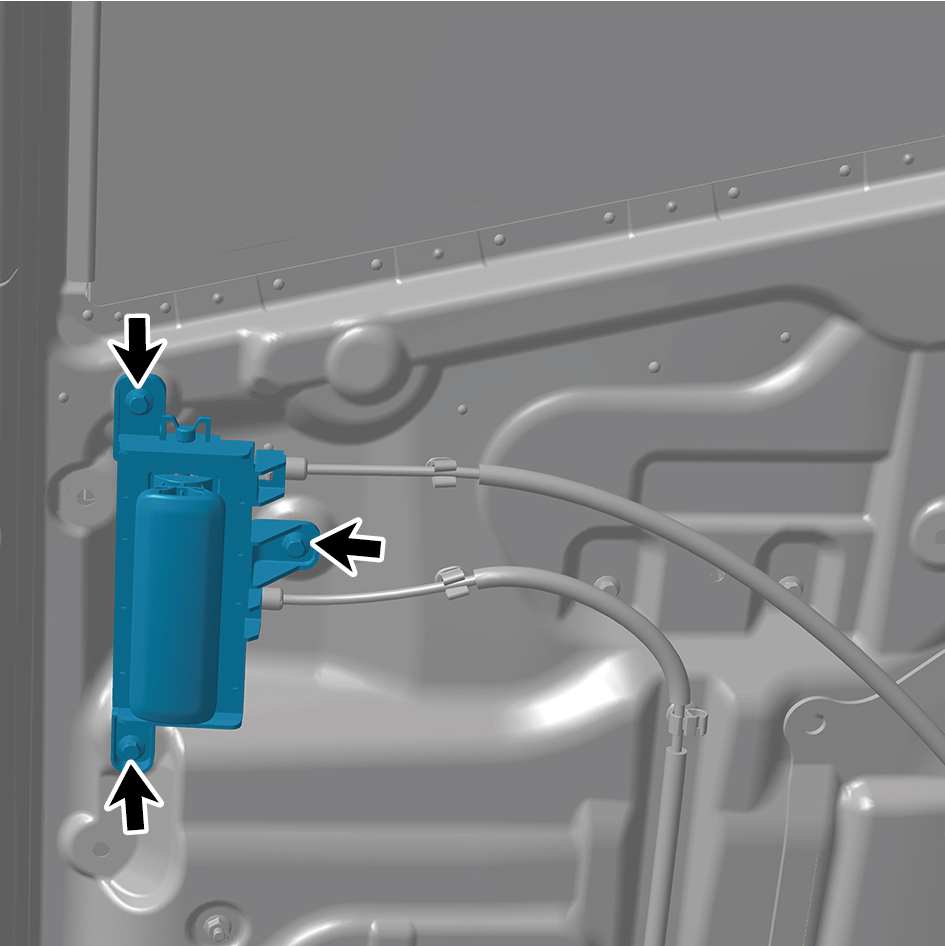
Torque:(6.5 +/- .75) ft lbs
4
Install the door protective plate assembly.
5
Install the cable cover plate.
6
Close the door.
6.29.3.2 Replacement of Door Protective Plate Assembly
Assembly
Removal Procedures
1
Open the door.
2
Remove the cable cover plate.
3
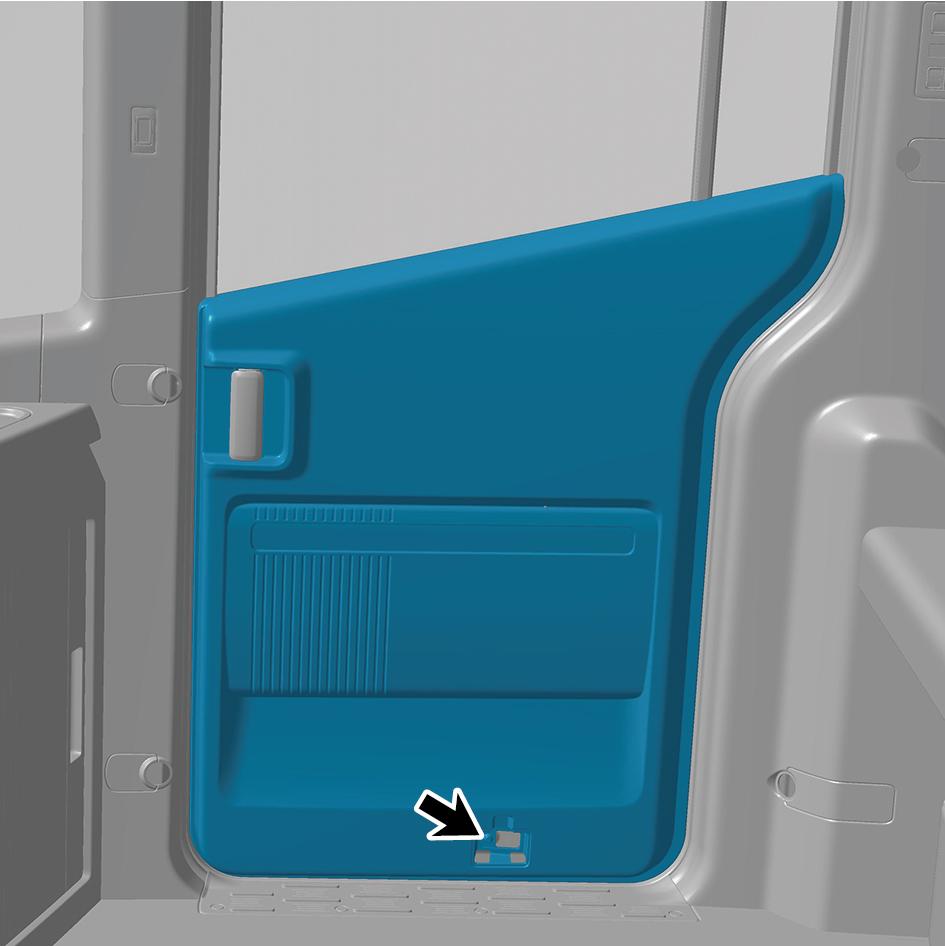
Remove 1 fixing bolt of the door protective plate assembly.
4
Remove the door protective plate assembly.
Installation Procedures
1
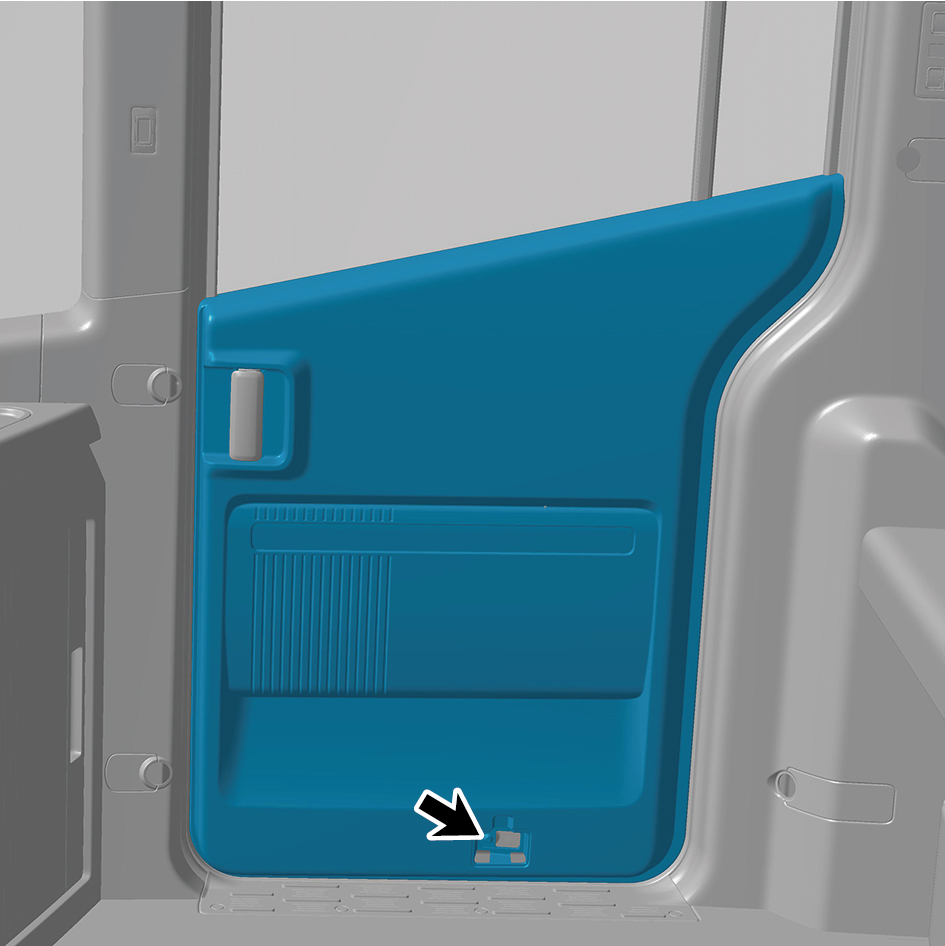
Move the door protective plate assembly to the mounting
position.
2
Install 1 fixing bolt of the door protective plate assembly.
Torque: (6.5 +/- .75) ft lbs
3
Install the cable cover plate.
4
Close the door.