← Back to Contents
6 Vehicle Body / 6.27 Seat Belt Device | PDF pages 864-871
6.27 Seat Belt Device
6.27 Seat Belt Device
6.27.1 Description and Operation
6.27.1.1 Description and Operation
Wearing seat belts is the main way to protect occupants. The
seat belts are used to restrain the occupants' bodies on the
seats, preventing the occupants' bodies from rushing out of
the seats and causing secondary collisions with internal
components such as the steering wheel and IP in the event of
a collision, thereby minimizing occupant casualties. Seat belts
not only reduce the risk of secondary collisions for occupants,
but also prevent them from being thrown away from their
seats in dangerous situations such as vehicle rollover.
Including but not limited to the following situations:
1. Frontal impact collision.
2. Rear impact collision.
3. Side impact collision.
4. Rollover type collision.
6.27.2 Specifications
6.27.2.1 Fastener Specifications
Range Of Torque
Fastener Specifications
Specifications
Foot Pounds of Torque (ft lbs)
The fixing bolt connecting the rear seat
belt assembly and the white body
(37 +/- 3.5) ft lbs
M10
assembly
The fixing bolt connecting the rear seat
belt buckle assembly and the rear seat
(37 +/- 3.5) ft lbs
M10
assembly
6.27.3 Decomposition Diagram
6.27.3.1 Decomposition Diagram
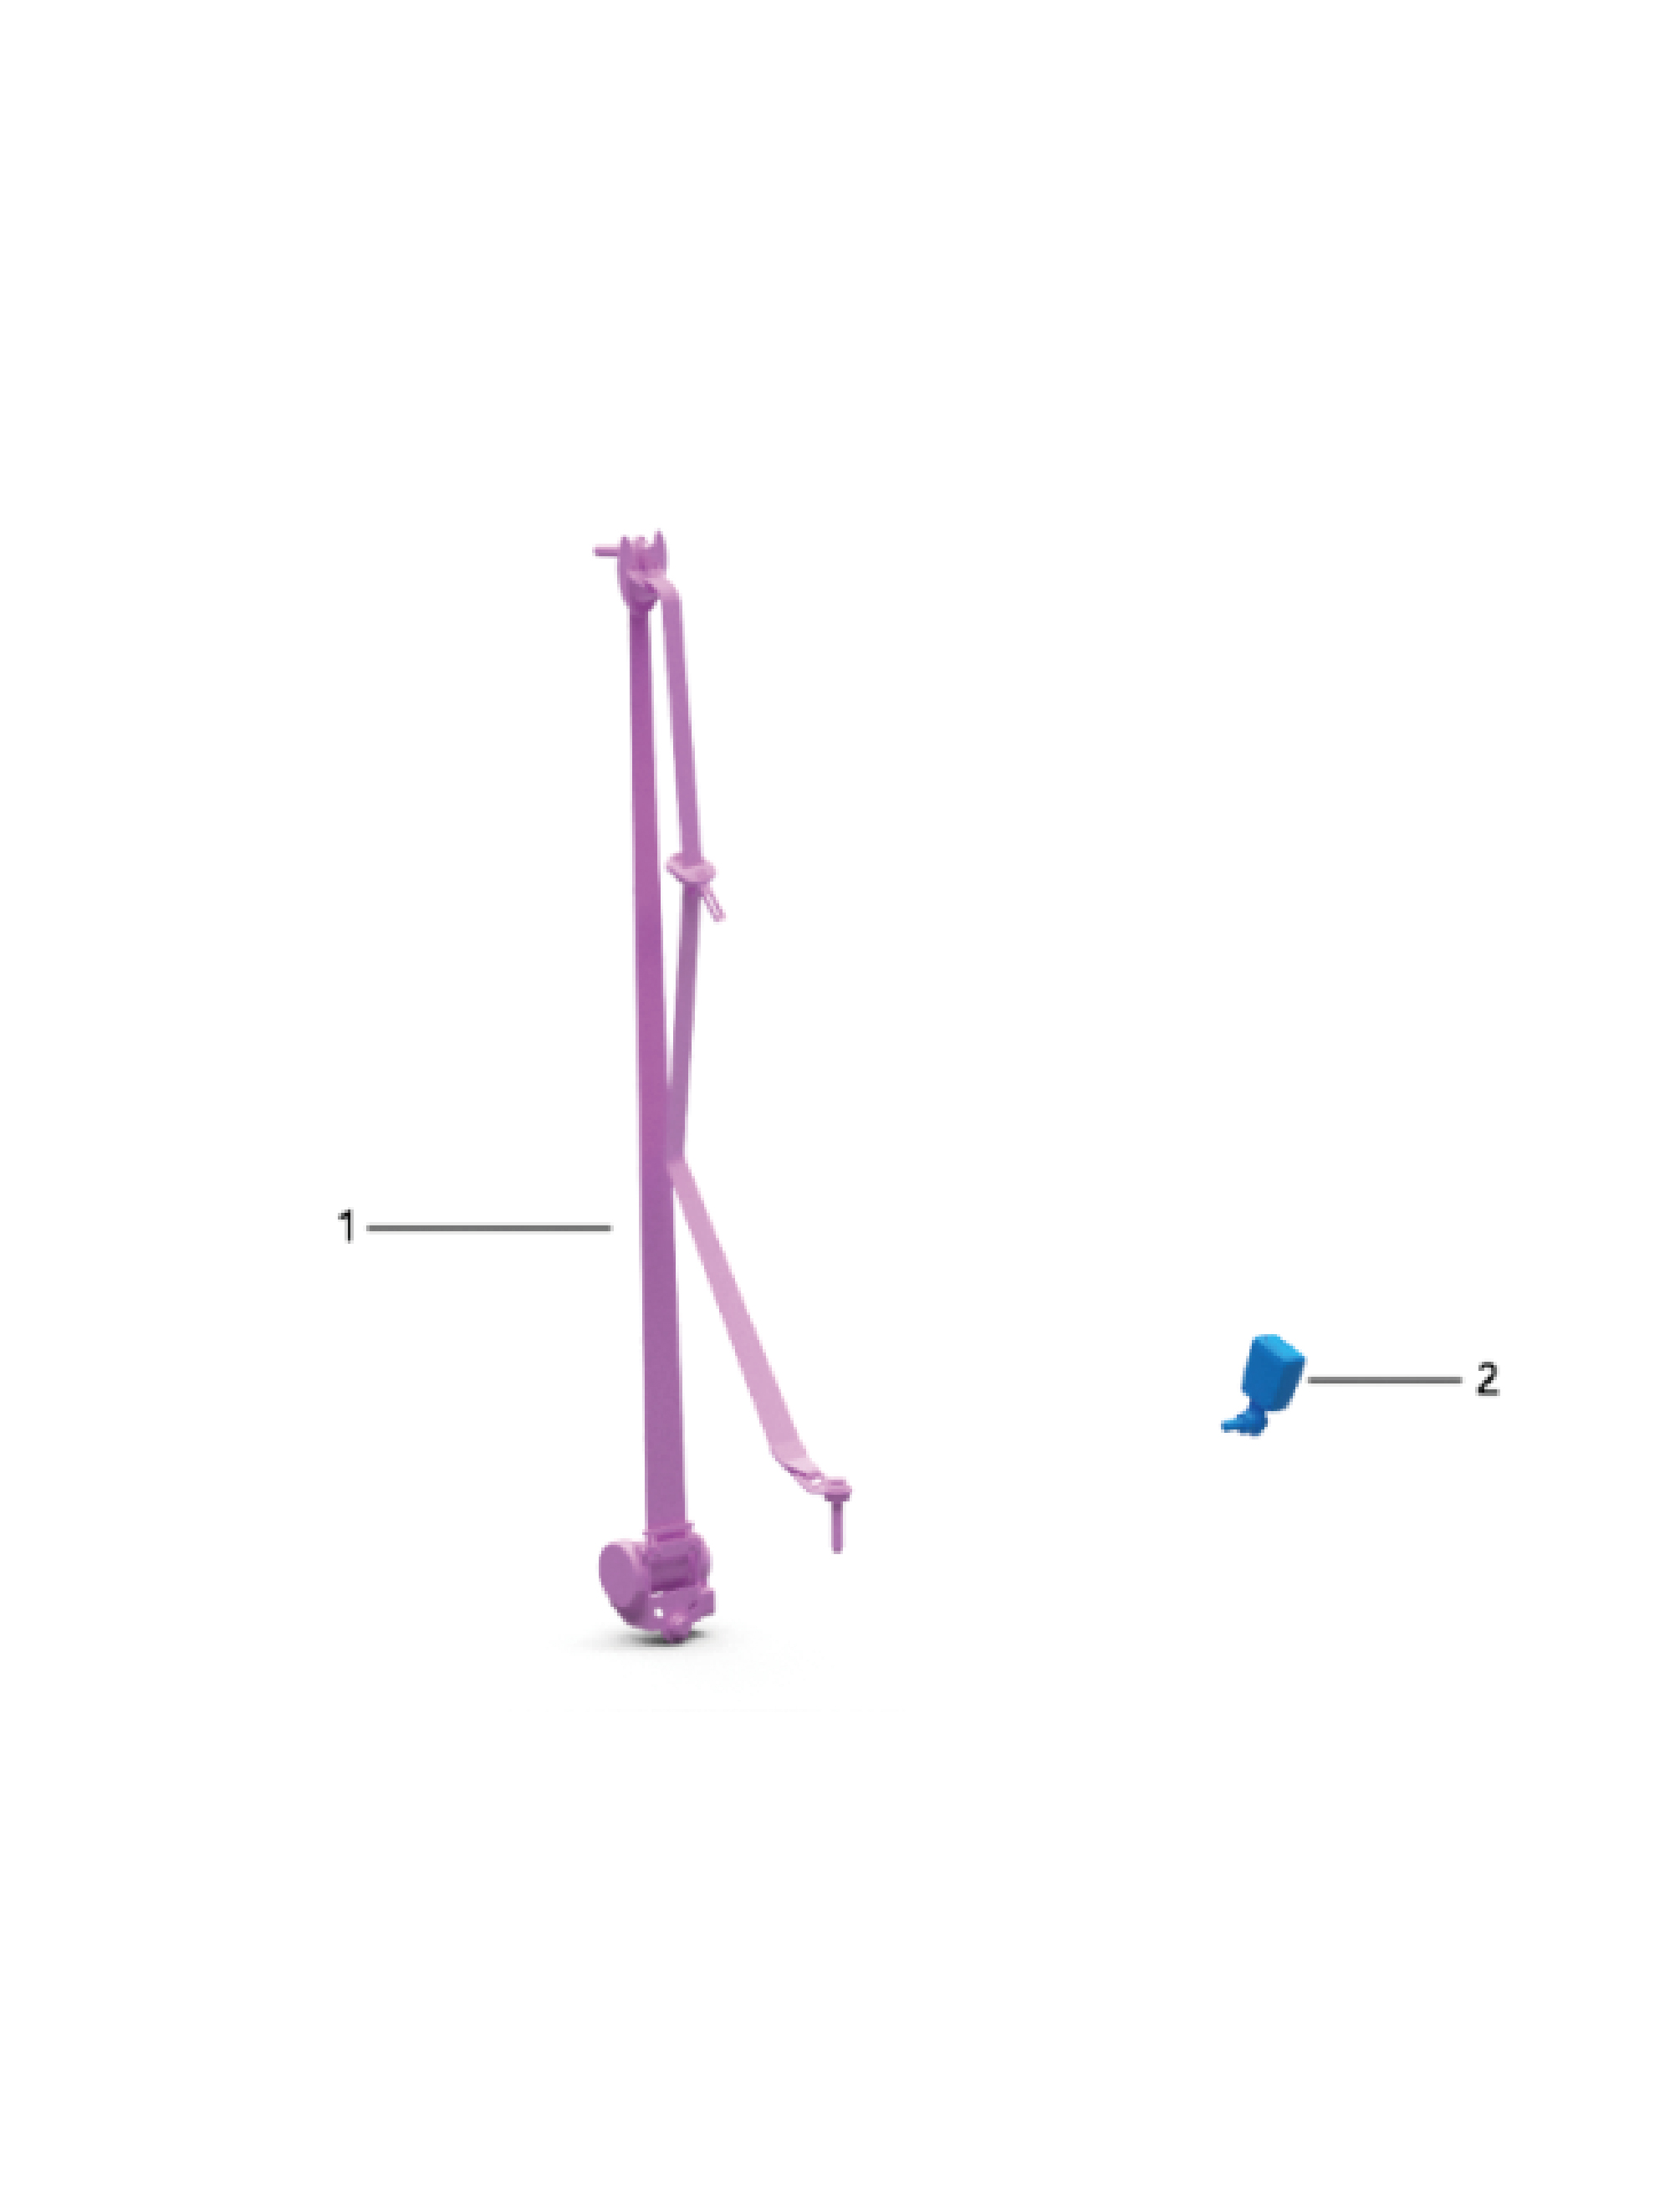
1.
2.
Rear Seat Belt Assy
Rear Seat Belt Locking Assy
6.27.4 Dismantling and Installation
6.27.4.1 Replacement of Rear Seat Belt Assembly
Assembly
Removal Procedures
1
Open the door.
2
Open the front flip cover plate.
3
Disconnect the battery negative cable.
caution
power down the high-voltage system before
disconnecting the negative pole of the storage
battery.
4
Remove the right sill molding assembly.
5
Remove the door opening sealing strip assembly.
6
Remove the safety hammer fixing bracket.
7
Remove the rear boarding handrail assembly.
8
Remove the SSM.
9
Remove the right rear side wall protective plate assembly.
10
Remove the IP left upper trim panel assembly.
11
Remove the left A-pillar protective plate assembly.
12
Remove the left front side wall protective plate assembly.
13
Remove the front USB interface.
14
Remove the IP left access cover plate assembly.
15
Remove the left switch panel assembly.
16
Remove the left switch panel lower trim panel assembly.
17
Remove the IP left lower trim panel assembly.
18
Remove the left middle side wall lower trim panel
assembly.
19
Remove the left middle side wall middle trim panel
assembly.
caution
1.First remove the break glass hammer's zipper
cover, carefully take out the break glass hammer's
pull ring and place it inside the trim panel.
2.Be careful to avoid accidentally pulling the break
glass hammer's pull ring.
20
Remove the left B-pillar upper protective plate assembly.
21
Remove the left middle side wall protective plate
assembly.
22
Remove the side wall clothes rail assembly.
23
Remove the left rear side wall protective plate assembly.
24
Remove the rear wall storage box protective plate.
25
Remove the rear wall storage box base.
26
Remove the coat hook.
27
Remove the seat rear storage box.
28
Remove the seat assy-rear.
29
Remove the rear wall protective plate assembly.
30
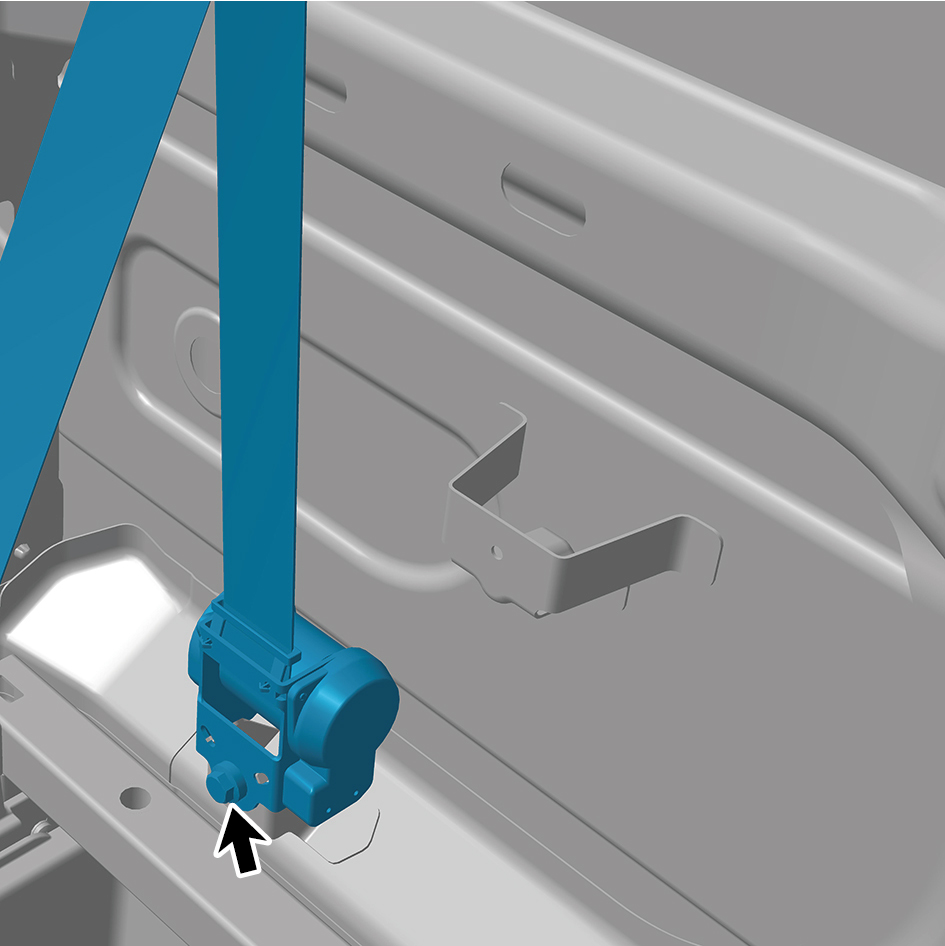
Remove 2 fixing bolt of the rear seat belt assembly.
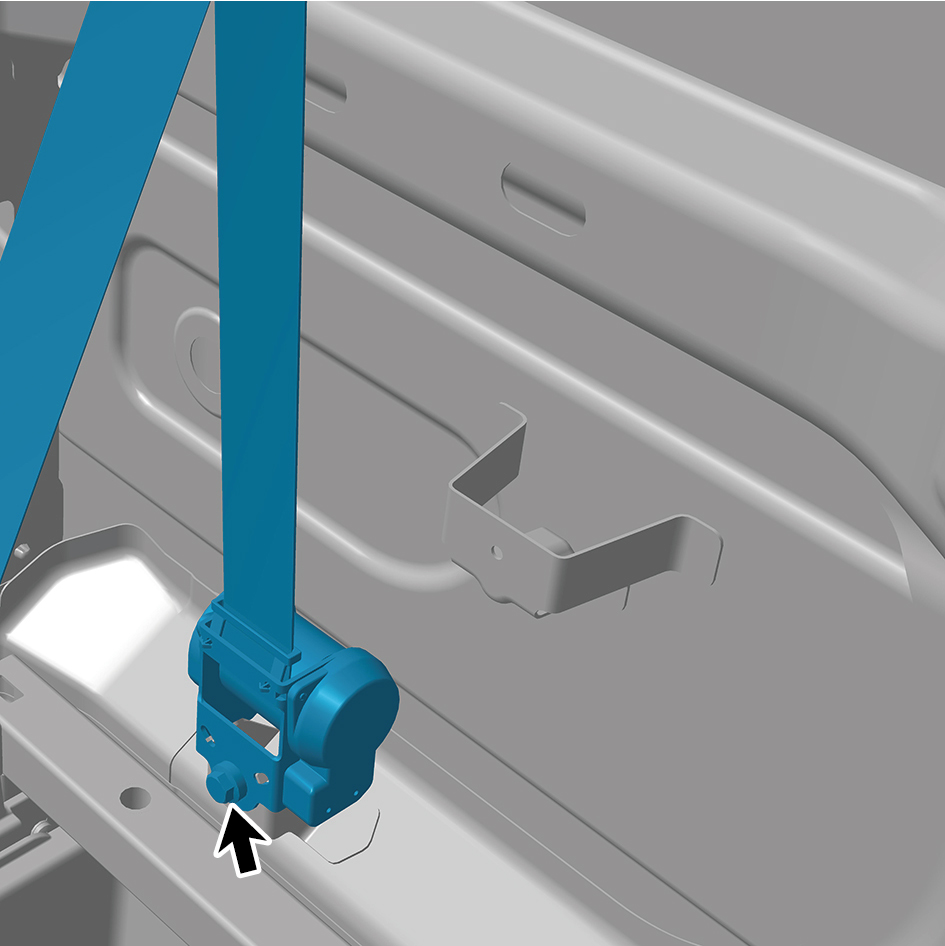
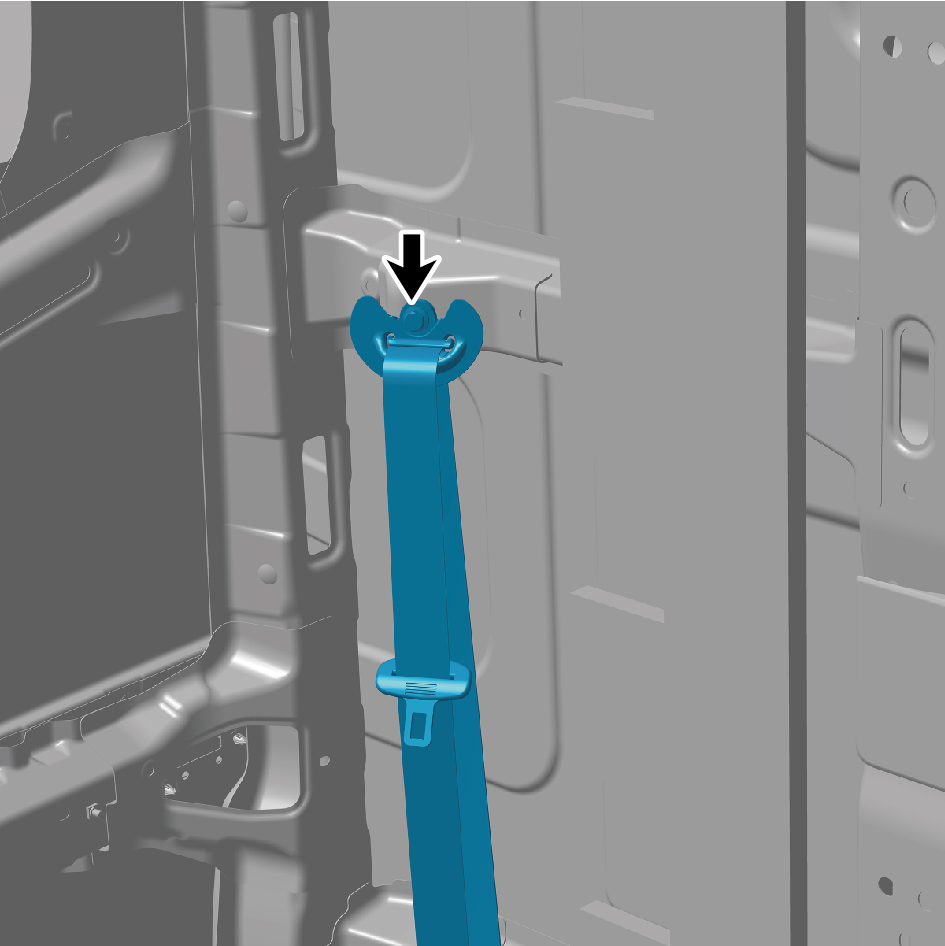
31
Remove the rear seat belt assembly.
Installation Procedures
1
Move the rear seat belt assembly to the mounting
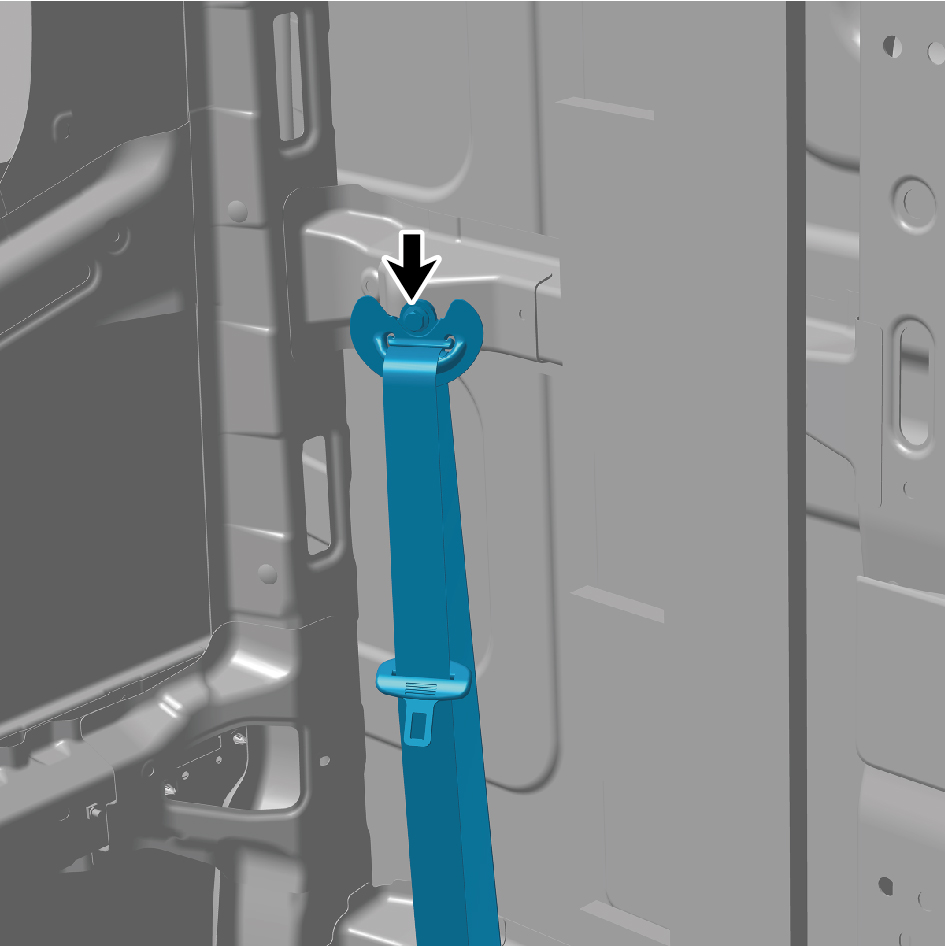
position.
2
Install 2 fixing bolt of the rear seat belt assembly.
Torque: (37 +/- 3.5) ft lbs
3
Install the rear wall protective plate assembly.
4
Install the seat assy-rear.
5
Install the seat rear storage box.
6
Install the coat hook.
7
Install the rear wall storage box base.
8
Install the rear wall storage box protective plate.
9
Install the left rear side wall protective plate assembly.
10
Install the side wall clothes rail assembly.
11
Install the left middle side wall protective plate assembly.
12
Install the left B-pillar upper protective plate assembly.
13
Install the left middle side wall middle trim panel assembly.
14
Install the left middle side wall lower trim panel assembly.
15
Install the IP left lower trim panel assembly.
16
Install the left switch panel lower trim panel assembly.
17
Install the left switch panel assembly.
18
Install the IP left access cover plate assembly.
19
Install the front USB interface.
20
Install the left front side wall protective plate assembly.
21
Install the left A-pillar protective plate assembly.
22
Install the IP left upper trim panel assembly.
23
Install the right rear side wall protective plate assembly.
24
Install the SSM.
25
Install the rear boarding handrail assembly.
26
Install the safety hammer fixing bracket.
27
Install the door opening sealing strip assembly.
28
Install the right sill molding assembly.
29
Connect the battery negative cable.
30
Close the front flip cover plate.
31
Close the door.
6.27.4.2 Replacement of Rear Seat Belt Buckle Assembly
Buckle Assembly
Removal Procedures
1
Open the door.
2
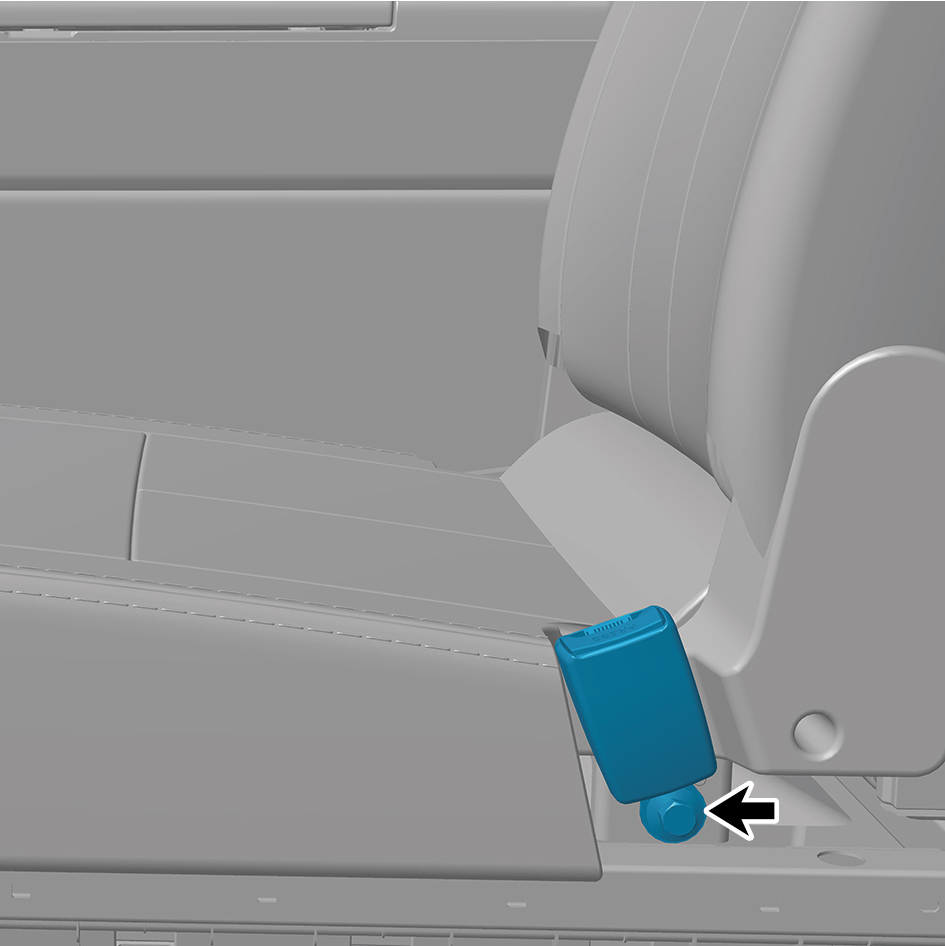
Remove 1 fixing bolt of the rear seat belt buckle assembly.
3
Remove the rear seat belt buckle assembly.
Installation Procedures
1
Move the rear seat belt buckle assembly to the mounting
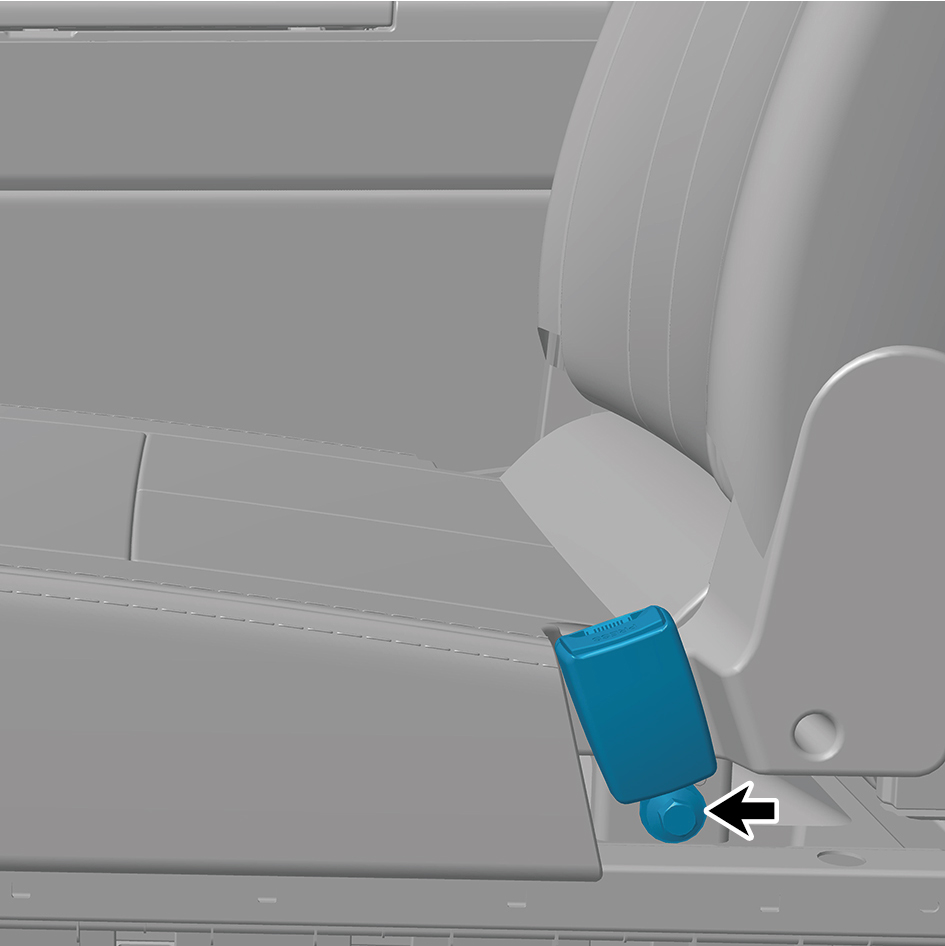
position.
2
Install 1 fixing bolt of the rear seat belt buckle assembly.
Torque:(37 +/- 3.5) ft lbs
3
Close the door.